> ## Documentation Index
> Fetch the complete documentation index at: https://docs.getjumper.io/llms.txt
> Use this file to discover all available pages before exploring further.
# DaVinci Resolve Installation
> A step-by-step guide to installing Jumper for DaVinci Resolve
## Instructions
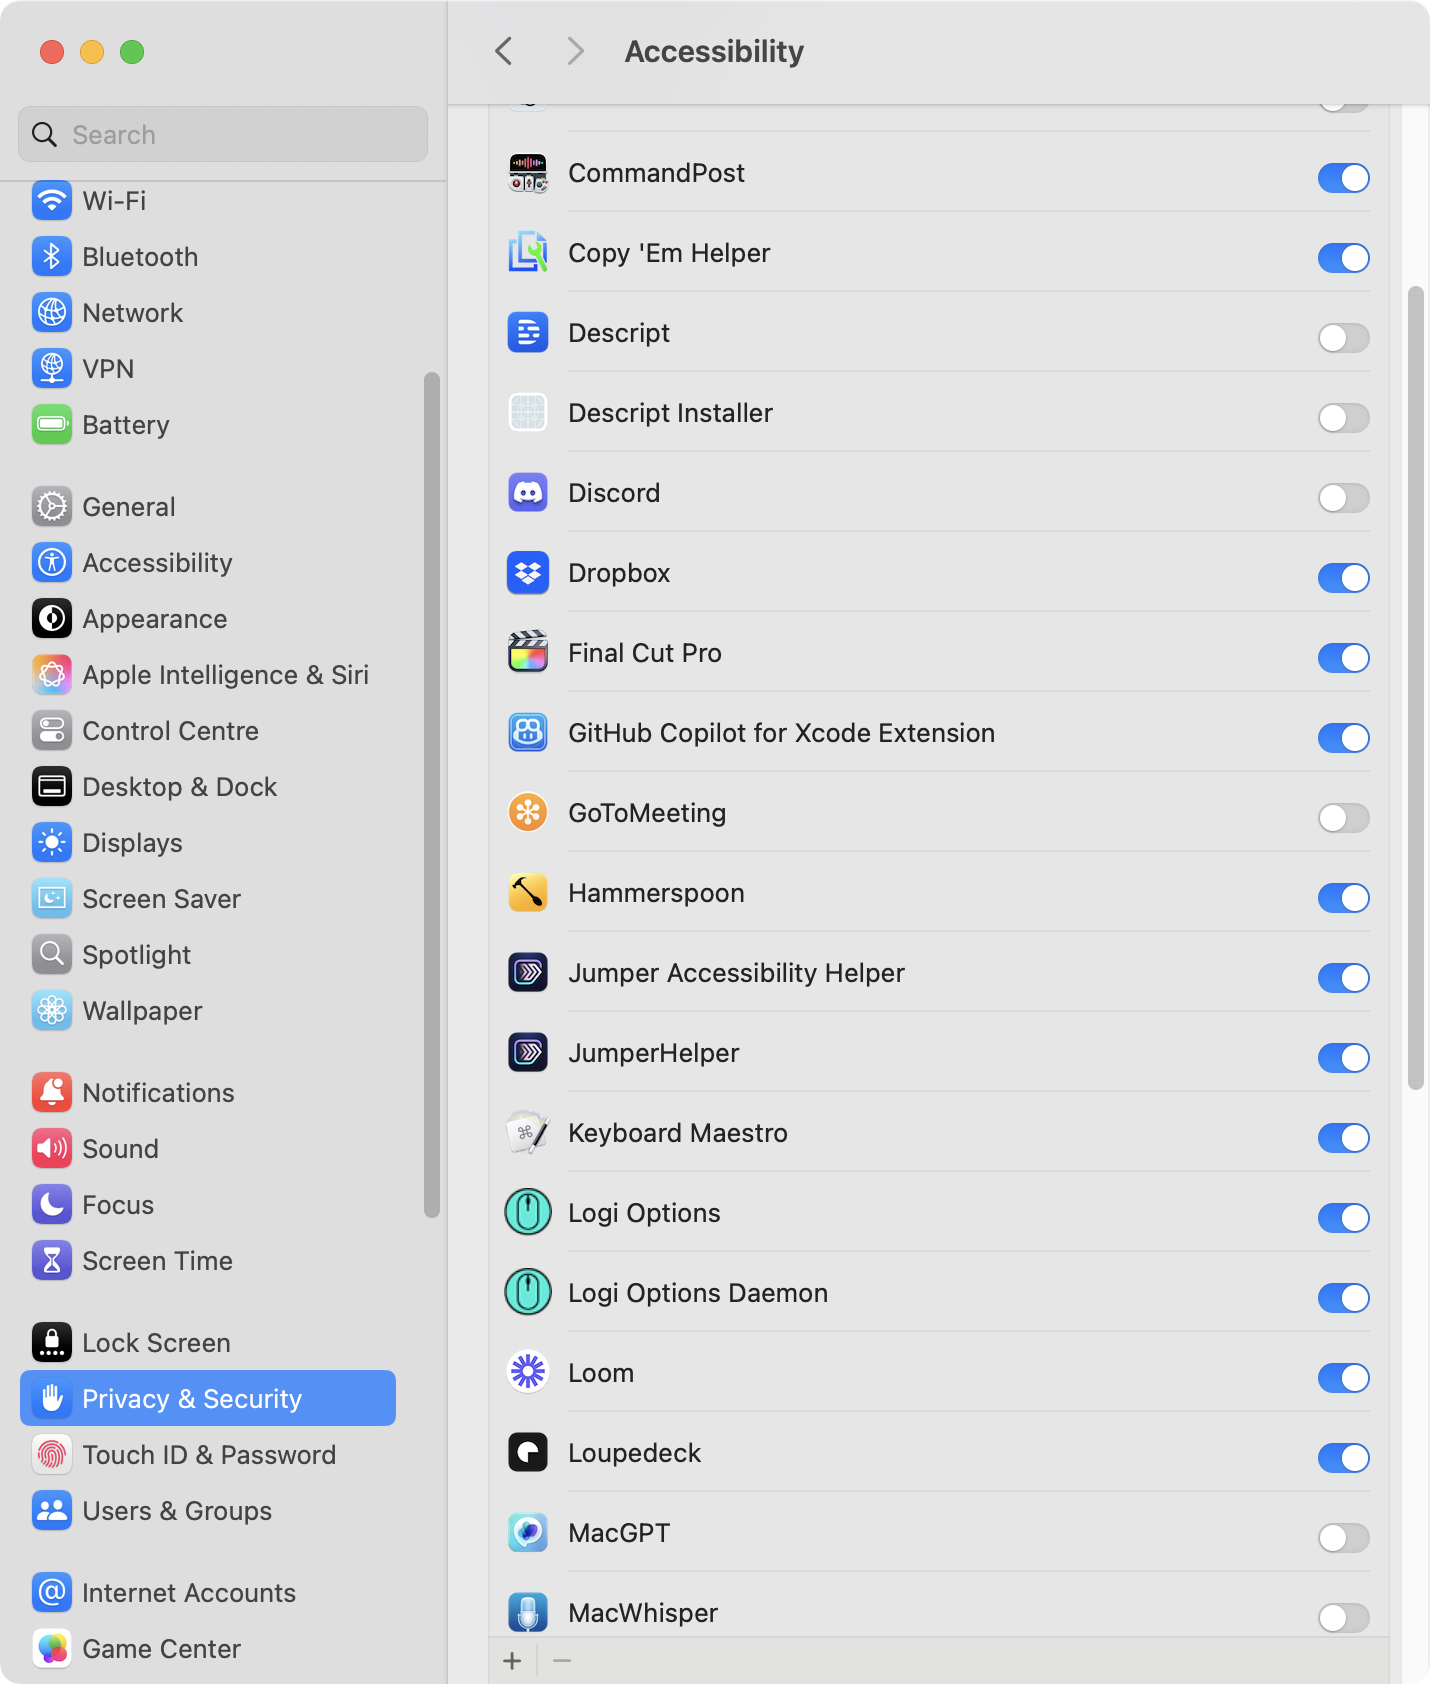
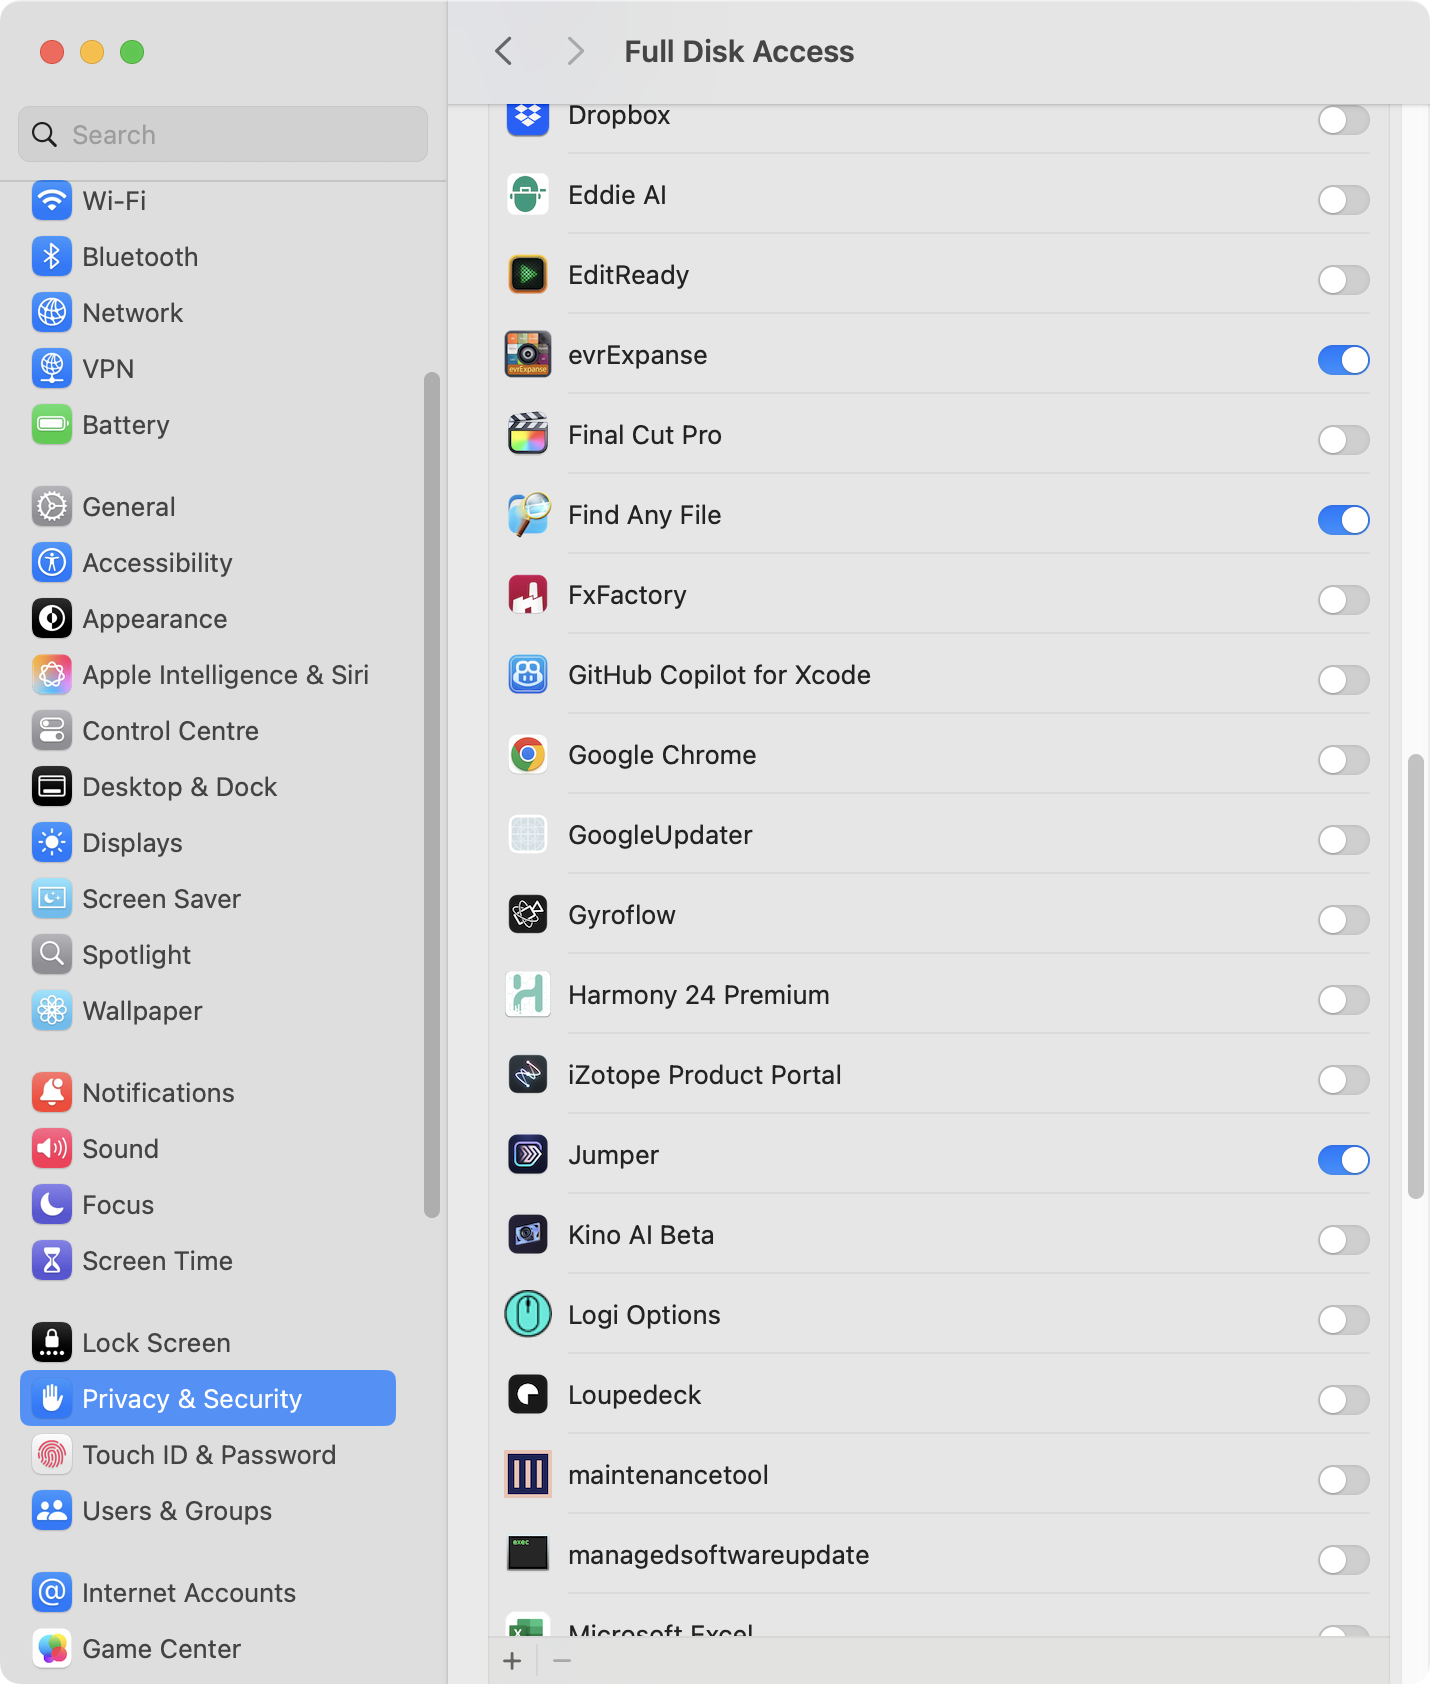
Make sure that Jumper is installed, and `JumperHelper` has **Accessibility Permission**, and `Jumper.app` has **Full Disk Access**. If you install Jumper for DaVinci Resolve, it will prompt you for these.
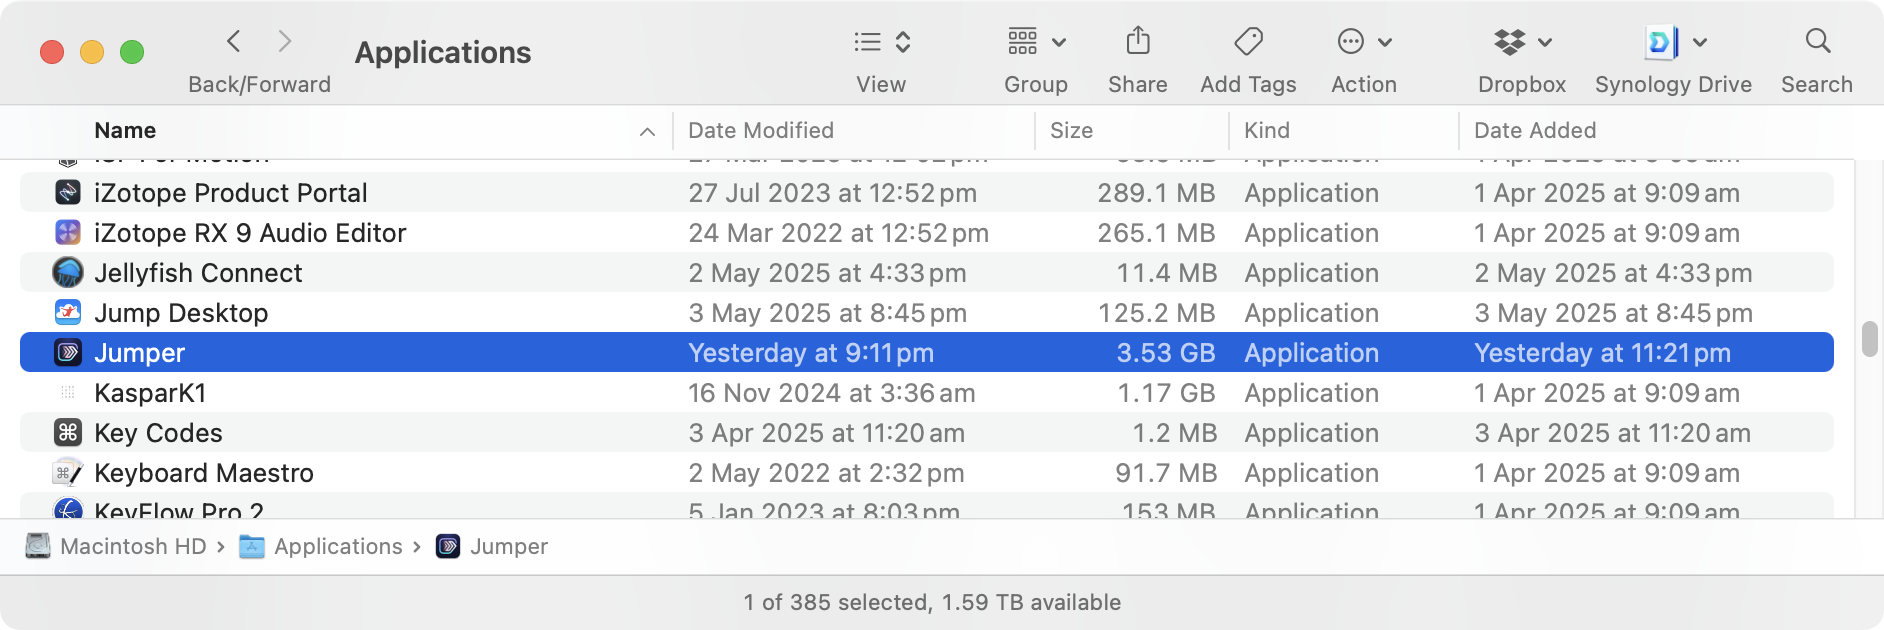
 Launch `Jumper.app` from your **Application** folder.
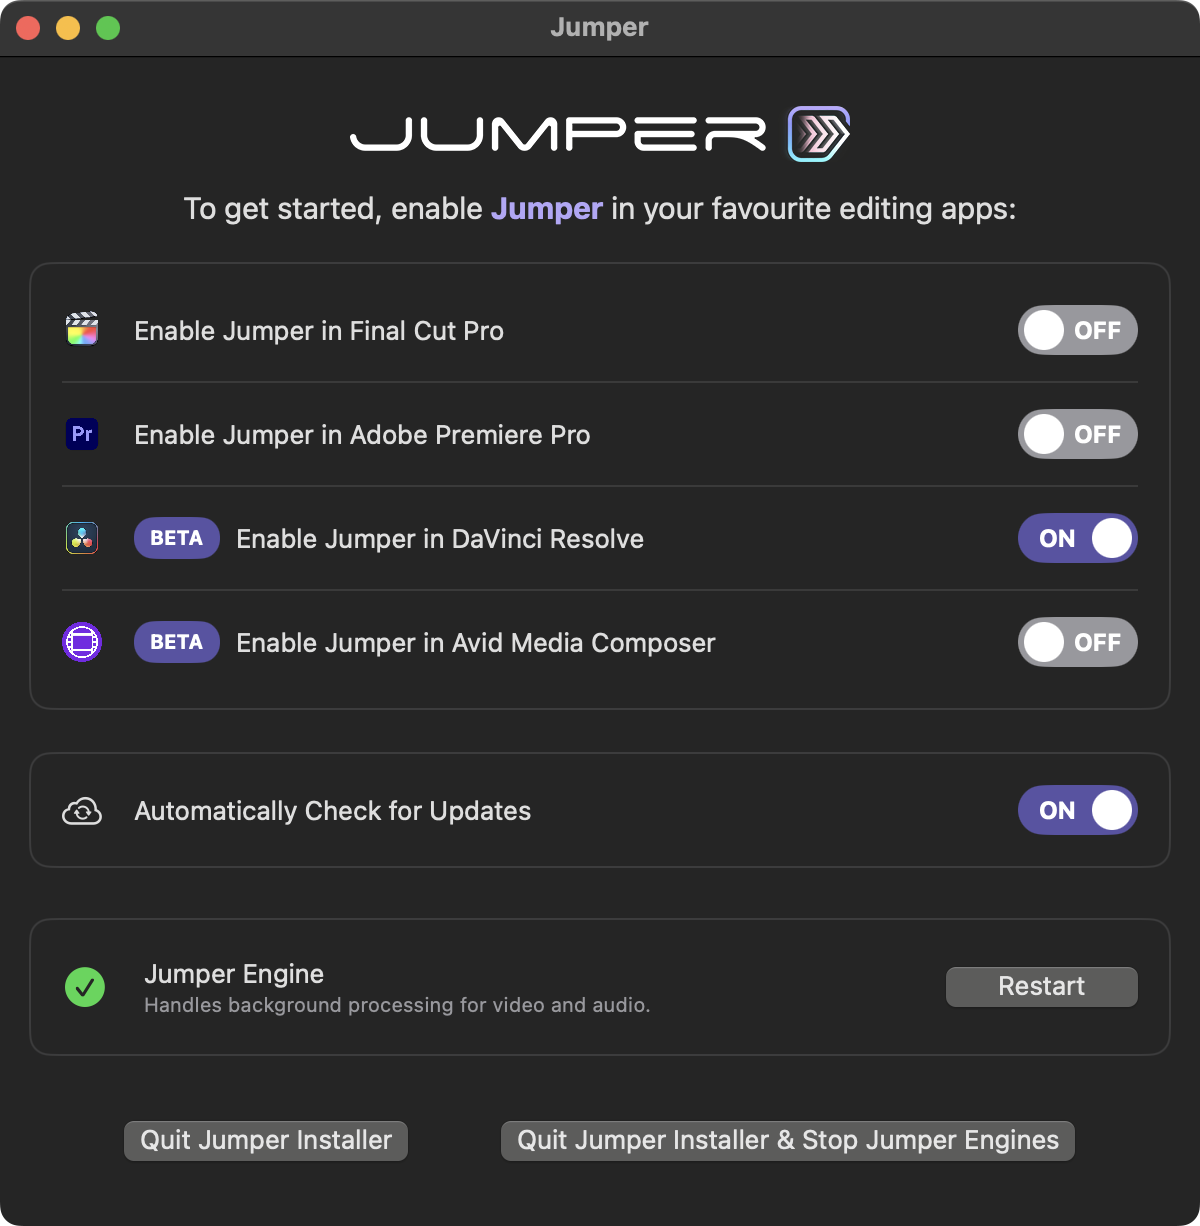
 Click the **Enable Jumper in DaVinci Resolve** toggle:
 Launch DaVinci Resolve.
Create a new Project or open an existing Project.
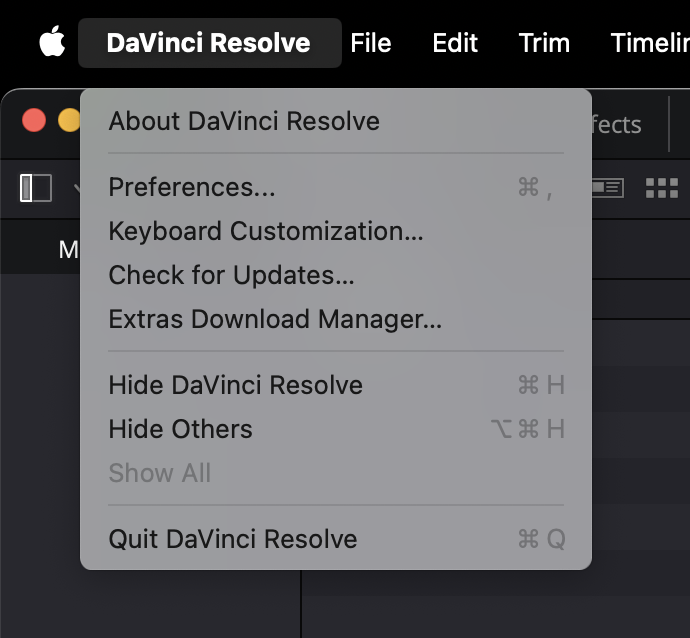
Go to **DaVinci Resolve -> Preferences** from the menubar.
Launch DaVinci Resolve.
Create a new Project or open an existing Project.
Go to **DaVinci Resolve -> Preferences** from the menubar.
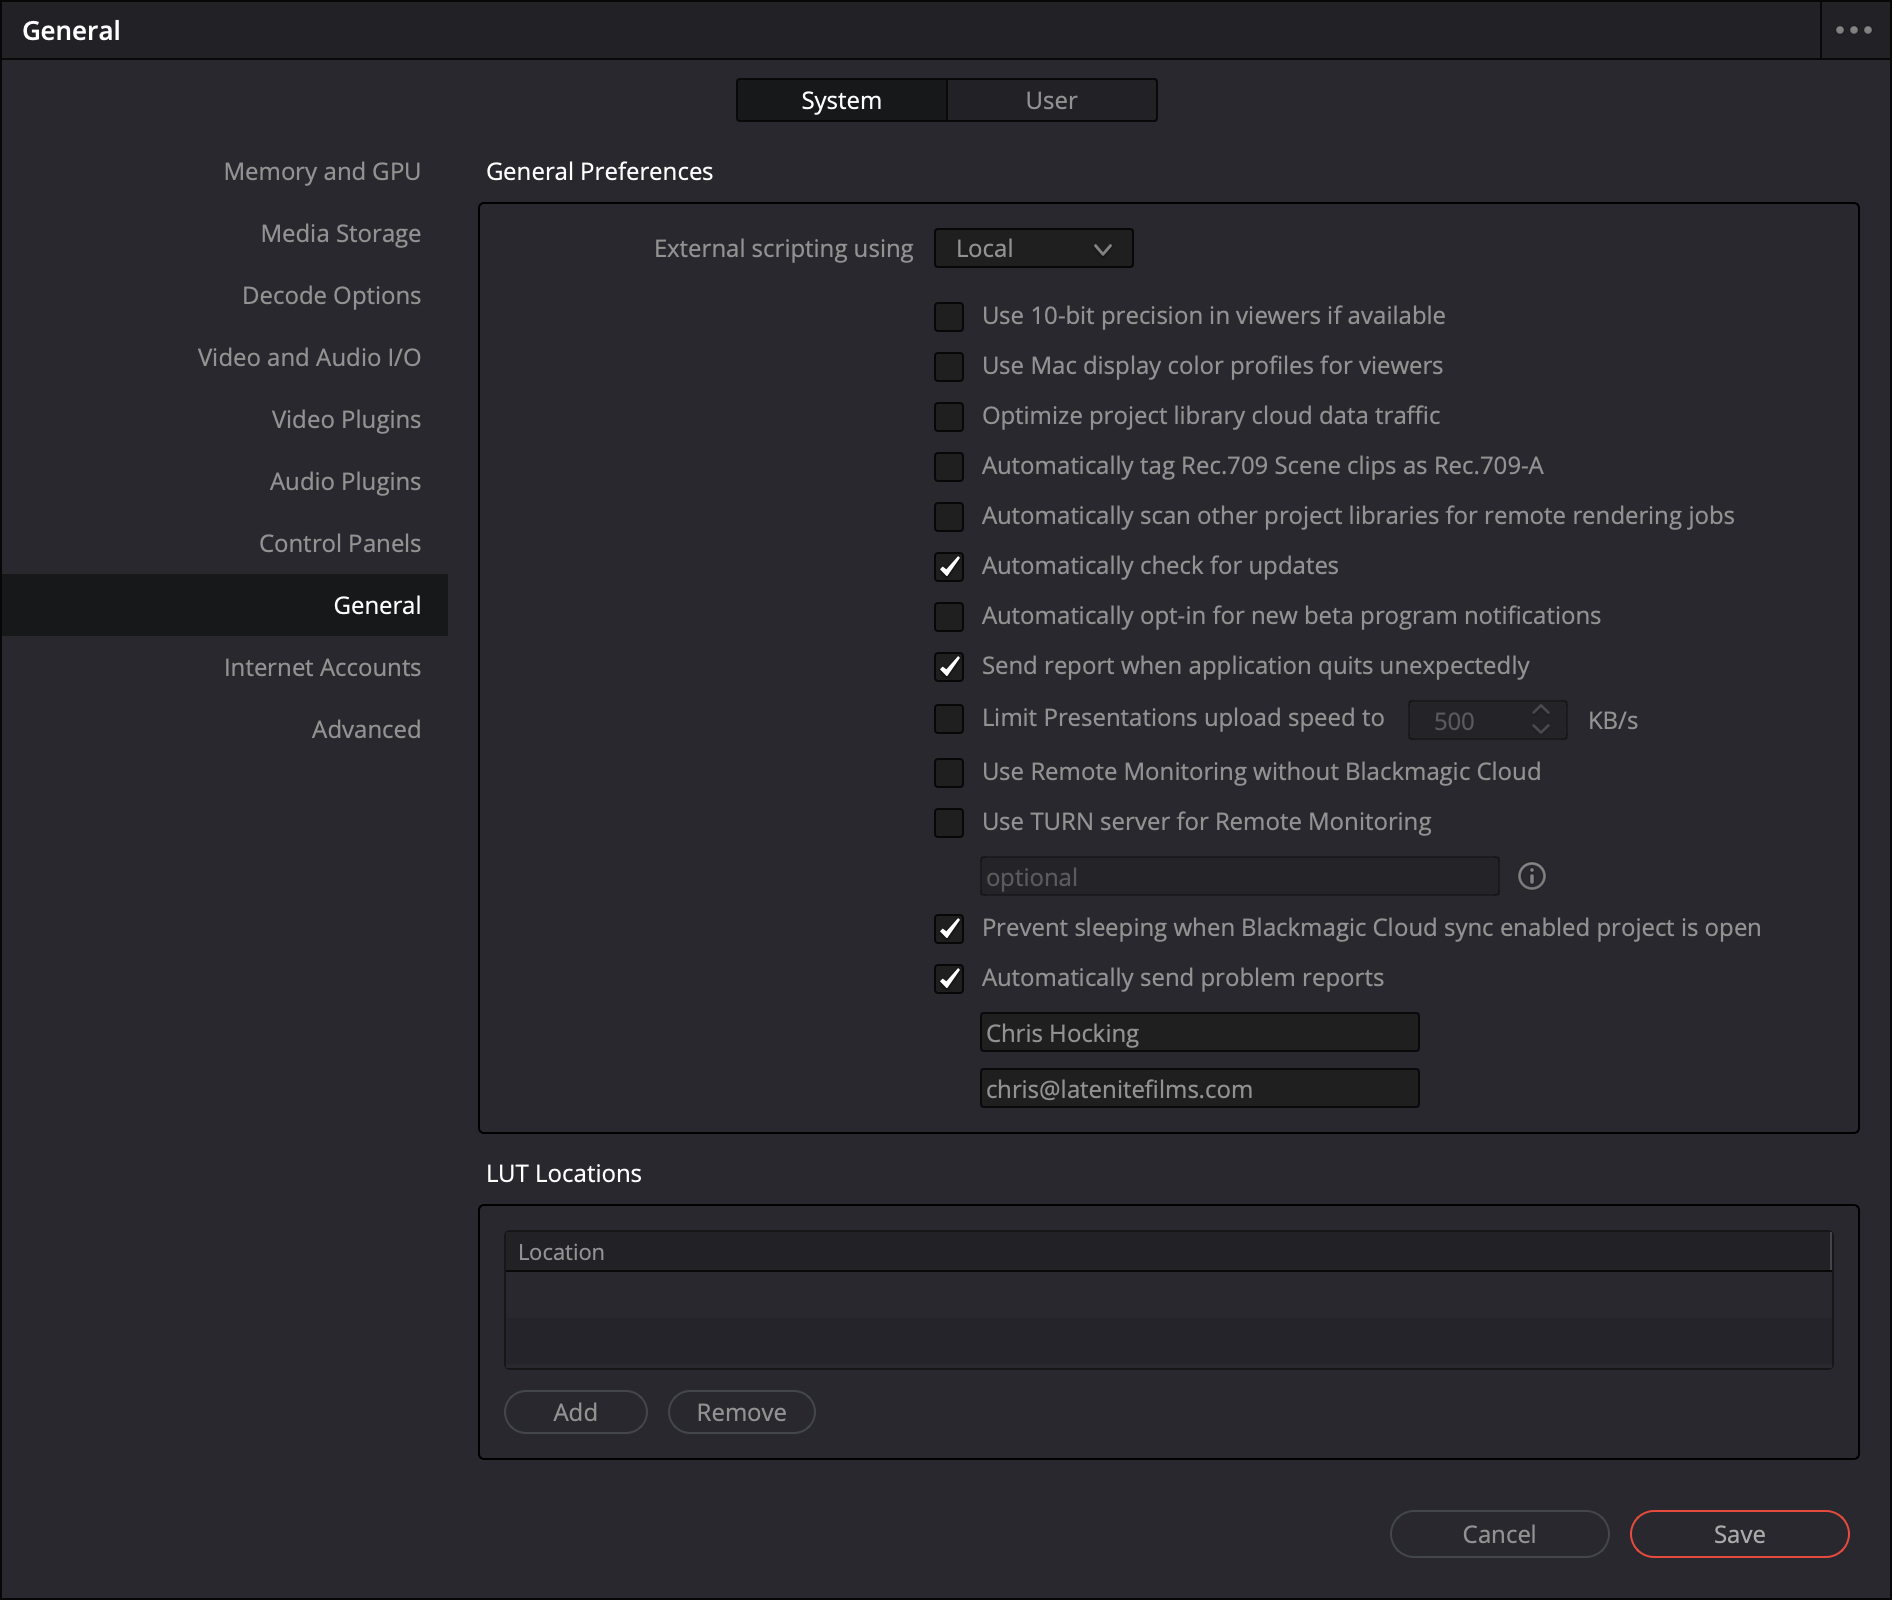
 In the **General** tab, make sure that **External scripting using** is set to **Local** or **Network**.
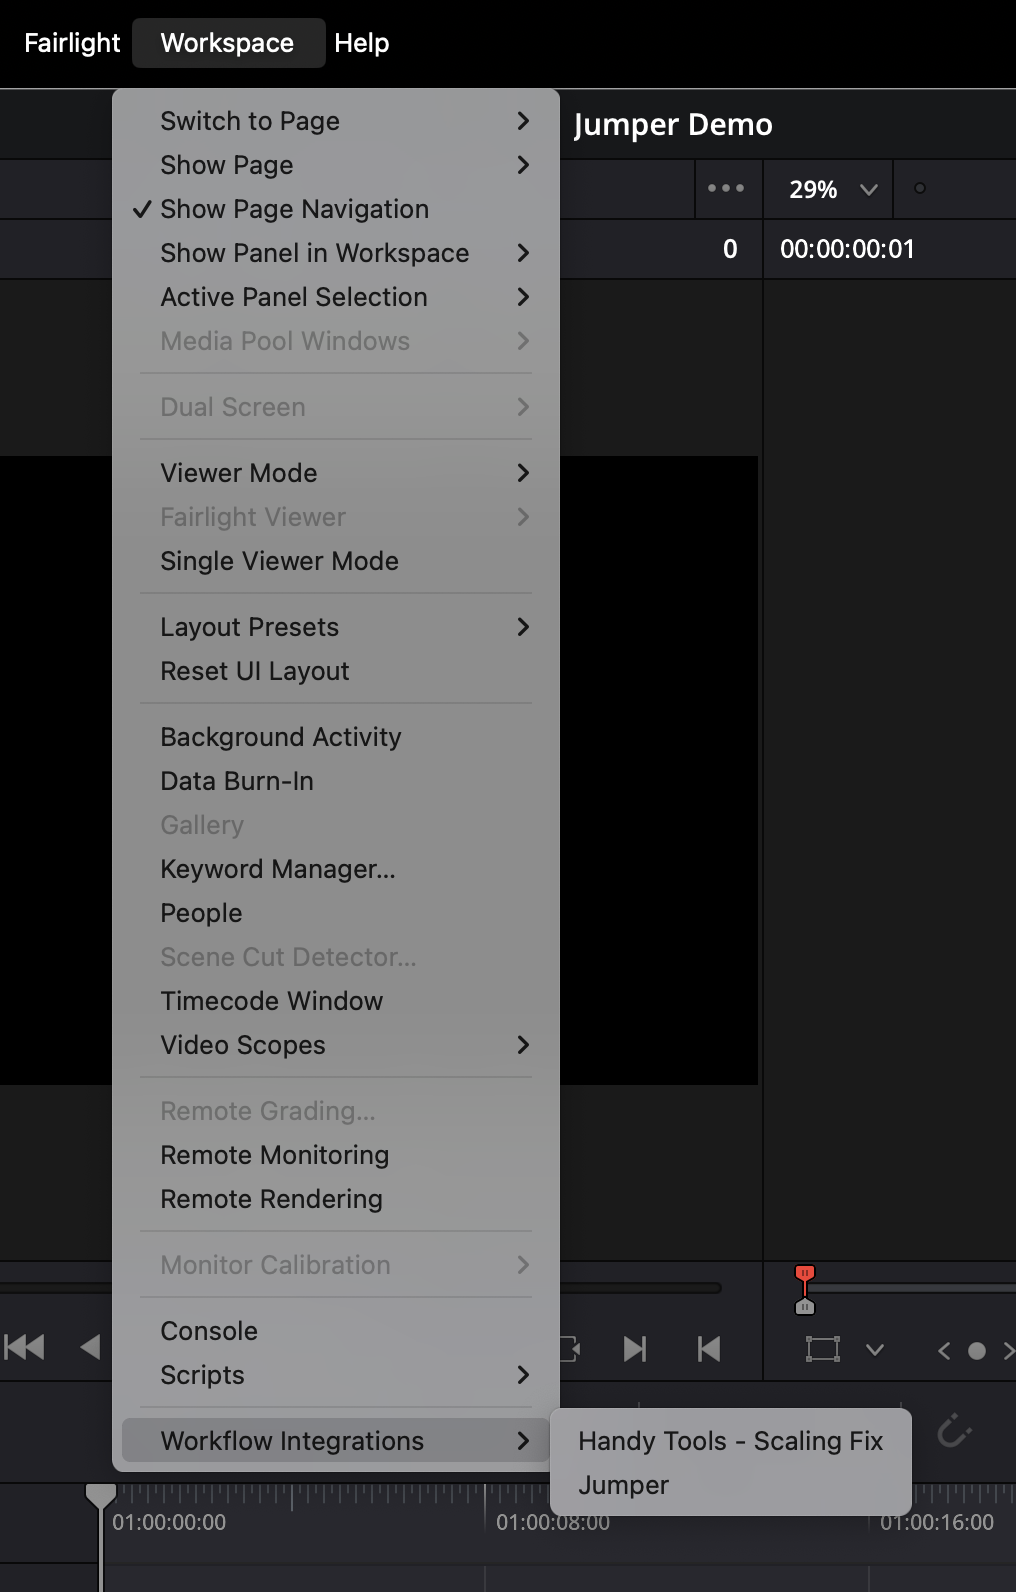
 You can now launch Jumper from the **Workspace -> Workflow Integrations -> Jumper** menubar.
 You're now good to use Jumper, the same as in other editing software. 🥳
 Install Jumper. Jumper will run in the background in the taskbar / system tray.
Start DaVinci Resolve.
Open Jumper from the Resolve menu.
Follow the onboarding process.
## Required shortcuts
Jumper relies on default DaVinci Resolve shortcuts and menu paths to work around gaps in the Resolve API. If you use custom keyboard shortcuts, these features may not work correctly.
| Shortcut / Action | Purpose |
| :------------------------------------------------------- | :----------------------------------------------------------------------------------- |
| **Shift + I** | "Go to in point" — moves the playhead in the Source Monitor when Jumper marks in/out |
| **Ctrl + 3** (Windows) / **Cmd + 3** (macOS) | Export current frame from Source Viewer — used for the Match Source button |
| **Workspace -> Active Panel Selection -> Source Viewer** | Focus the Source Viewer — used when exporting a frame for Match Source |
Custom keyboard shortcuts will break playhead movement, Match Source, and related features. Use DaVinci Resolve's default shortcuts, or restore them for these actions.
DaVinci Resolve must be set to **English** for the menu automation (Workspace -> Active Panel Selection -> Source Viewer) to work.
## Troubleshooting
### Playhead doesn't move when marking in/out
Jumper uses **Shift + I** ("Go to in point") to move the playhead after marking in/out. If the playhead doesn't move, or the search term appears before the in point, you likely have a custom keyboard shortcut that overrides the default. See [Required shortcuts](#required-shortcuts) above.
Install Jumper. Jumper will run in the background in the taskbar / system tray.
Start DaVinci Resolve.
Open Jumper from the Resolve menu.
Follow the onboarding process.
## Required shortcuts
Jumper relies on default DaVinci Resolve shortcuts and menu paths to work around gaps in the Resolve API. If you use custom keyboard shortcuts, these features may not work correctly.
| Shortcut / Action | Purpose |
| :------------------------------------------------------- | :----------------------------------------------------------------------------------- |
| **Shift + I** | "Go to in point" — moves the playhead in the Source Monitor when Jumper marks in/out |
| **Ctrl + 3** (Windows) / **Cmd + 3** (macOS) | Export current frame from Source Viewer — used for the Match Source button |
| **Workspace -> Active Panel Selection -> Source Viewer** | Focus the Source Viewer — used when exporting a frame for Match Source |
Custom keyboard shortcuts will break playhead movement, Match Source, and related features. Use DaVinci Resolve's default shortcuts, or restore them for these actions.
DaVinci Resolve must be set to **English** for the menu automation (Workspace -> Active Panel Selection -> Source Viewer) to work.
## Troubleshooting
### Playhead doesn't move when marking in/out
Jumper uses **Shift + I** ("Go to in point") to move the playhead after marking in/out. If the playhead doesn't move, or the search term appears before the in point, you likely have a custom keyboard shortcut that overrides the default. See [Required shortcuts](#required-shortcuts) above.