> ## Documentation Index
> Fetch the complete documentation index at: https://docs.getjumper.io/llms.txt
> Use this file to discover all available pages before exploring further.
# Create and assign access policies
> Open the Admin Panel, create a policy that limits tabs and analysis folders, and assign it to licenses.
A policy controls which Jumper tabs and analysis folders a license can use. A policy can represent a role, a production, or a combination of the two.
Before you begin: you have a Jumper Enterprise license. For background on policies, see the [Enterprise overview](/enterprise/overview).
## Open the Admin Panel
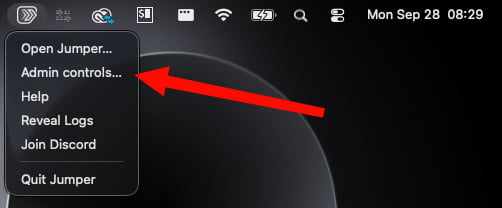
Select **Admin controls…** from Jumper's menu. The screenshot below shows the macOS menu bar menu.
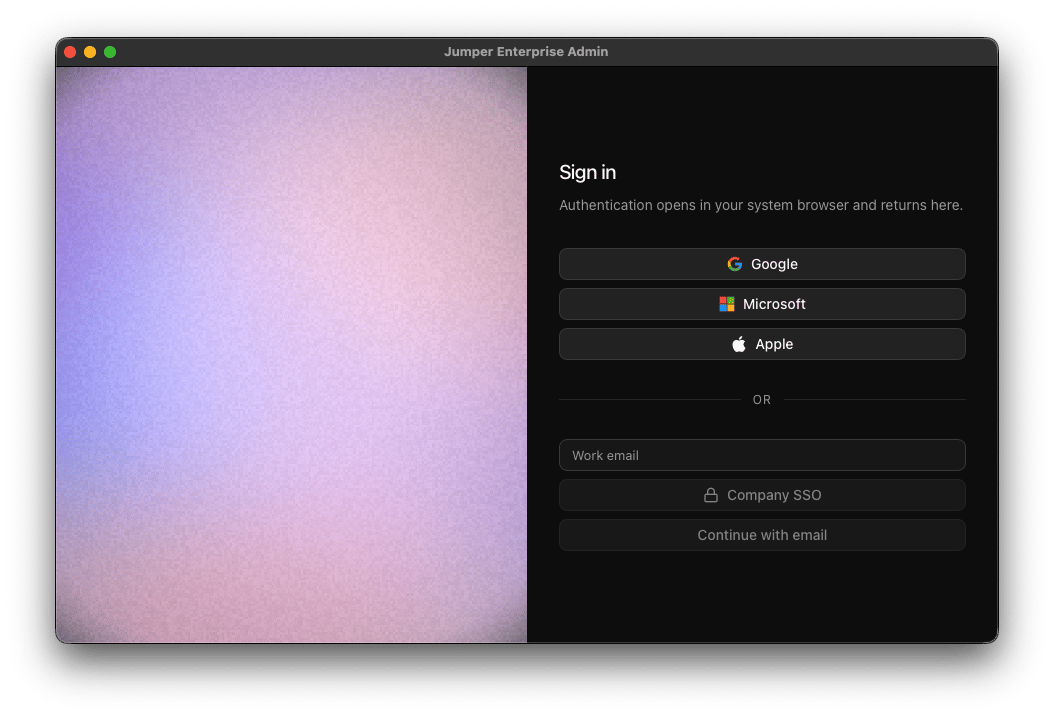
 Sign in with the account that manages your organization's Enterprise licenses. Authentication opens in your system browser and returns to the Admin Panel. The sign-in screen offers Google, Microsoft, Apple, email, and **Company SSO** when configured.
 ## Create a policy
For example, create a policy for editors who should search Show A and Show B without changing their analysis or face collections.
Open **Policies** and select **New**.
Give the policy a descriptive **Name**.
Under **Accessible tabs**, enable the tabs those licenses should be able to open.
Under **Analysis folders**, choose **Specific folders** and use **Enter a path** to add the allowed analysis locations, or choose **Any folder** for unrestricted folder access.
Select **Create policy**.
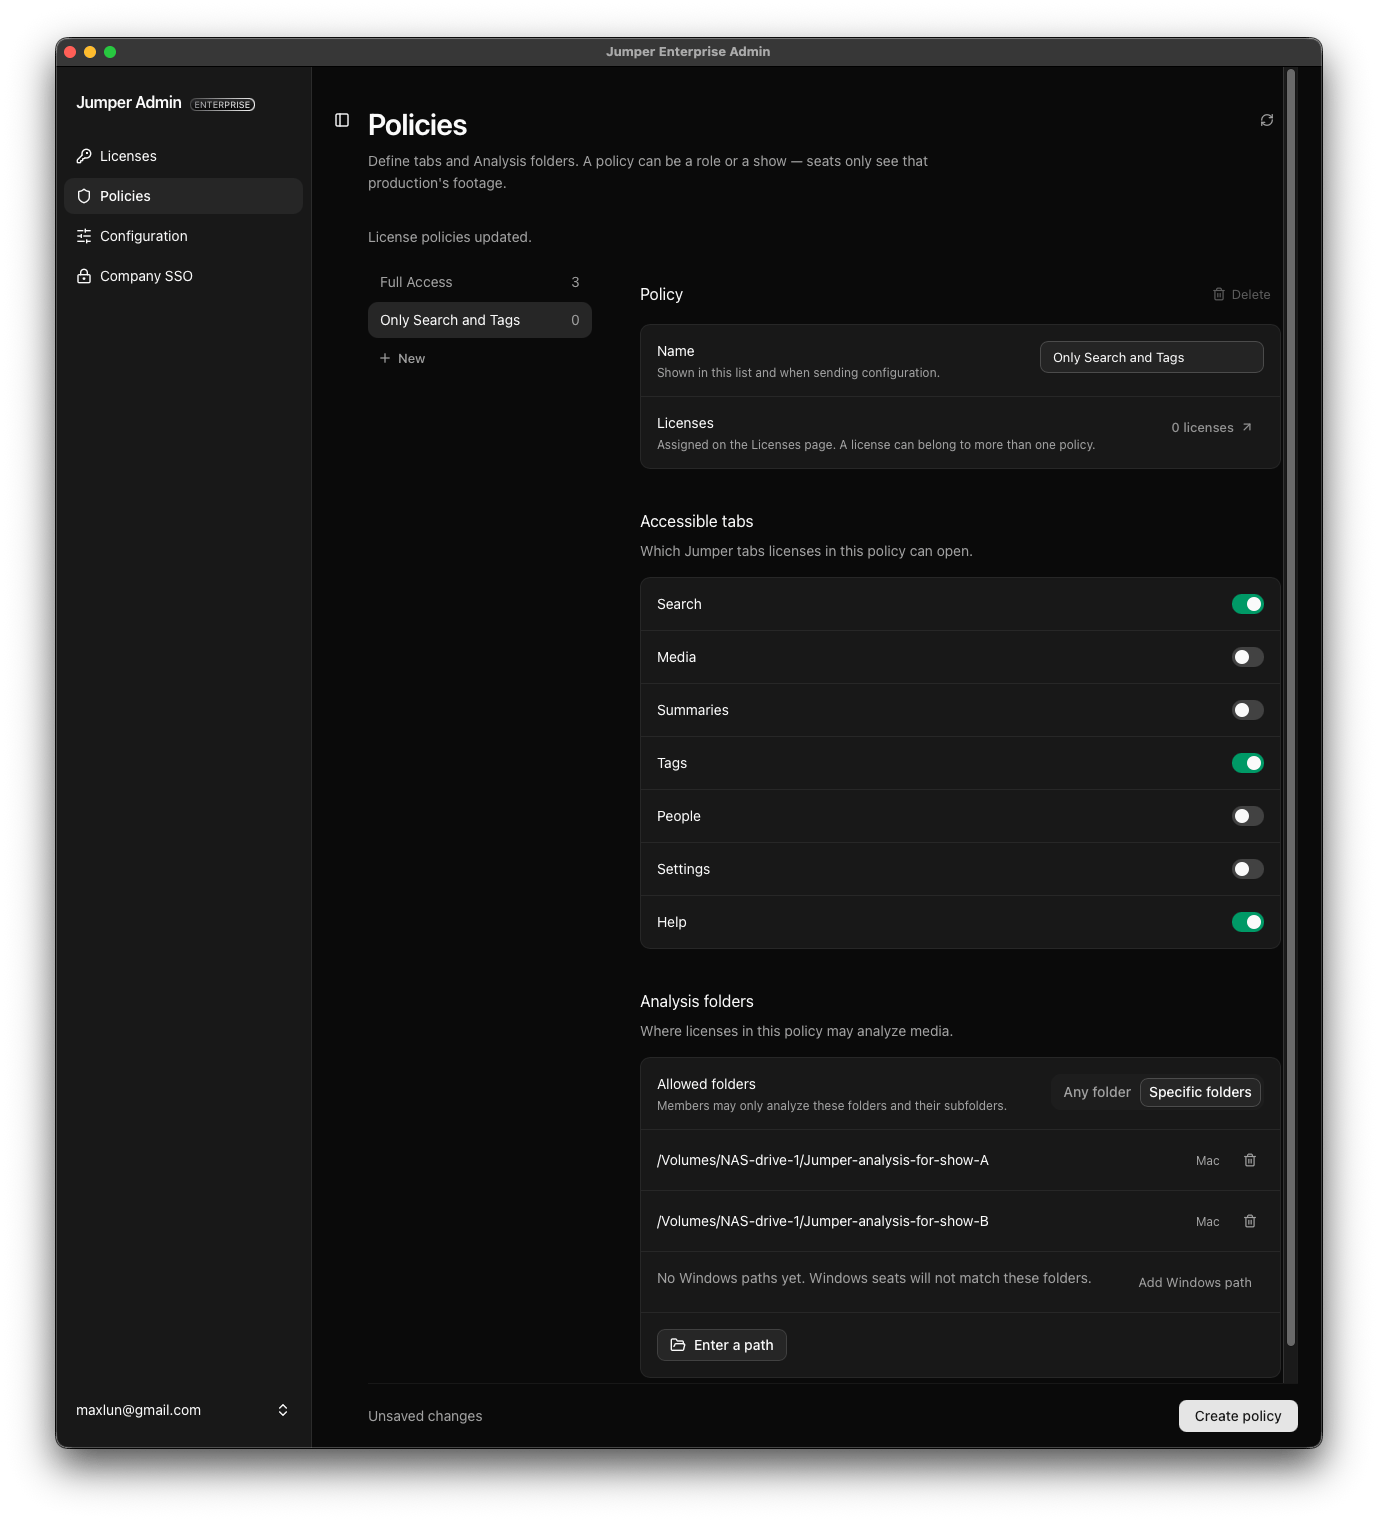
To provide search access without analysis, face collection management, or model and settings changes, enable **Search** and disable **Media**, **People**, and **Settings**. You can also control access to **Summaries**, **Tags**, and **Help**. The example below enables Search, Tags, and Help.
## Create a policy
For example, create a policy for editors who should search Show A and Show B without changing their analysis or face collections.
Open **Policies** and select **New**.
Give the policy a descriptive **Name**.
Under **Accessible tabs**, enable the tabs those licenses should be able to open.
Under **Analysis folders**, choose **Specific folders** and use **Enter a path** to add the allowed analysis locations, or choose **Any folder** for unrestricted folder access.
Select **Create policy**.
To provide search access without analysis, face collection management, or model and settings changes, enable **Search** and disable **Media**, **People**, and **Settings**. You can also control access to **Summaries**, **Tags**, and **Help**. The example below enables Search, Tags, and Help.
 ## Limit access by production
Add only the analysis folders that the policy's members should use. In the screenshot above, both **Show A** and **Show B** are allowed, while Show C is excluded. To keep the two shows separate, create one policy for Show A and another for Show B, each with only its own analysis folder.
Allowed paths include their subfolders. Add each production's analysis folder rather than a parent folder containing several productions.
Use paths as they appear on the editors' machines. For a team using both macOS and Windows, add the corresponding paths for both platforms. A macOS path alone will not match a Windows machine. The policy editor prompts you to add the missing platform's path.
Keep your shared storage permissions aligned with the same production access rules. See [project-specific analysis folders](/guides/shared-analysis#confidential-footage-and-project-specific-analysis-folders) for the storage setup.
## Assign policies to licenses
Open **Licenses** to see your organization's seats and their assigned policies. Use the policy dropdown beneath a license to change its memberships. You can also select multiple licenses and apply a policy to them together.
## Limit access by production
Add only the analysis folders that the policy's members should use. In the screenshot above, both **Show A** and **Show B** are allowed, while Show C is excluded. To keep the two shows separate, create one policy for Show A and another for Show B, each with only its own analysis folder.
Allowed paths include their subfolders. Add each production's analysis folder rather than a parent folder containing several productions.
Use paths as they appear on the editors' machines. For a team using both macOS and Windows, add the corresponding paths for both platforms. A macOS path alone will not match a Windows machine. The policy editor prompts you to add the missing platform's path.
Keep your shared storage permissions aligned with the same production access rules. See [project-specific analysis folders](/guides/shared-analysis#confidential-footage-and-project-specific-analysis-folders) for the storage setup.
## Assign policies to licenses
Open **Licenses** to see your organization's seats and their assigned policies. Use the policy dropdown beneath a license to change its memberships. You can also select multiple licenses and apply a policy to them together.
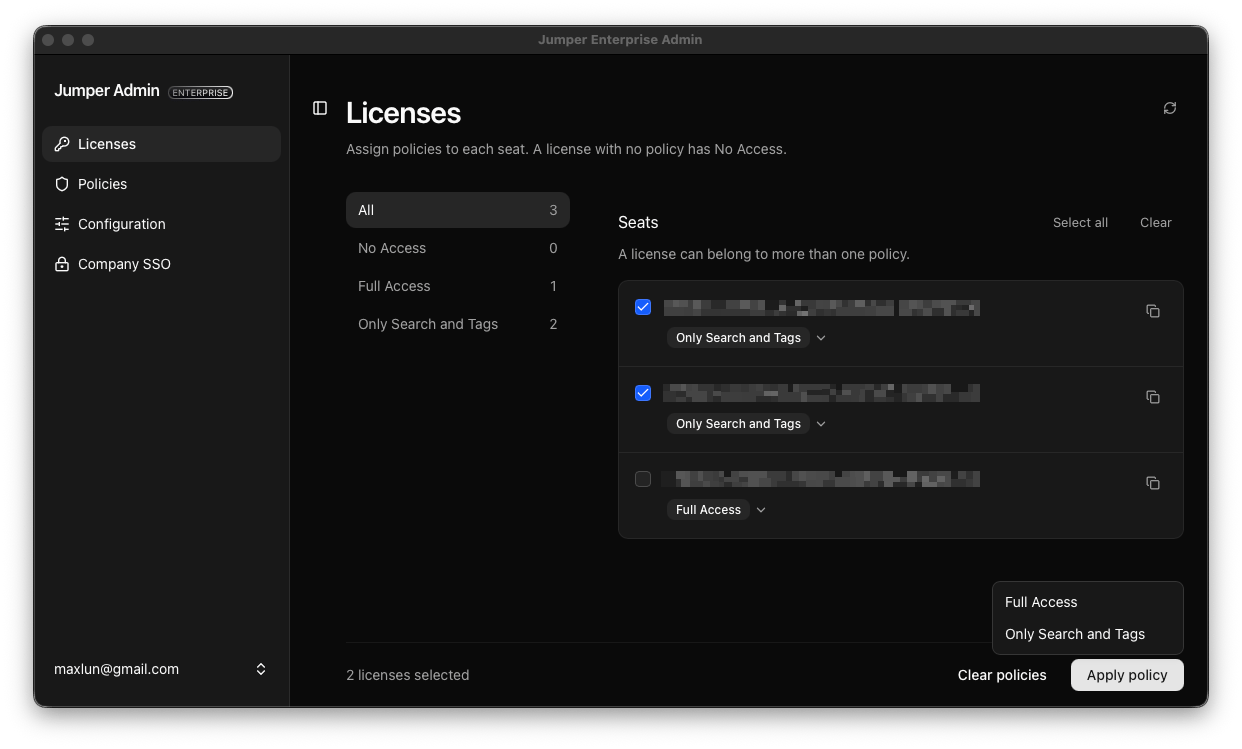 A license can belong to more than one policy, and the access granted by those policies is combined. When restricting a license, remove **Full Access** and any other policy that grants access beyond what that editor needs.
A license with no assigned policy has **No Access**. Assign a policy before handing the license to an editor. Sending a configuration alone does not grant access.
## Next
[Send a configuration](/enterprise/send-configuration) to the licenses you assigned.
This documentation is built and hosted on [Mintlify](https://mintlify.com), a developer documentation platform.
A license can belong to more than one policy, and the access granted by those policies is combined. When restricting a license, remove **Full Access** and any other policy that grants access beyond what that editor needs.
A license with no assigned policy has **No Access**. Assign a policy before handing the license to an editor. Sending a configuration alone does not grant access.
## Next
[Send a configuration](/enterprise/send-configuration) to the licenses you assigned.
This documentation is built and hosted on [Mintlify](https://mintlify.com), a developer documentation platform.