> ## Documentation Index
> Fetch the complete documentation index at: https://docs.getjumper.io/llms.txt
> Use this file to discover all available pages before exploring further.
# Local Agentic Editing with Jumper and LM Studio
> Set up fully local agentic editing in Jumper using LM Studio and a free open source local model.
This guide walks through a fully local agentic editing setup with Jumper using LM Studio. The LLM agent runs on your machine, there is no dependency on cloud AI services, and you do not need a paid model subscription to use it.
LM Studio gives you access to many local models. For Jumper, choose a model with **Tool Use** and **Vision** support. The **Gemma 4** and **Qwen 3.5** model families are good options. This guide uses a **Gemma 4** model.
For air-gapped networks or absolute privacy requirements, see [Agentic editing and data privacy](/core-concepts/agentic-editing-privacy). Once LM Studio and your model are installed, this workflow can run fully locally without an internet connection.
## Before you begin
* Jumper is installed and running locally
* You have media analyzed in Jumper if you want to test a real search right away
* You want the model and Jumper tool calls to stay on your machine
Model size matters a lot for local performance. Before downloading a large model, use a tool like [canirun.ai](https://canirun.ai) or LM Studio's own memory estimate to sanity-check what your machine can handle.
## Step-by-step
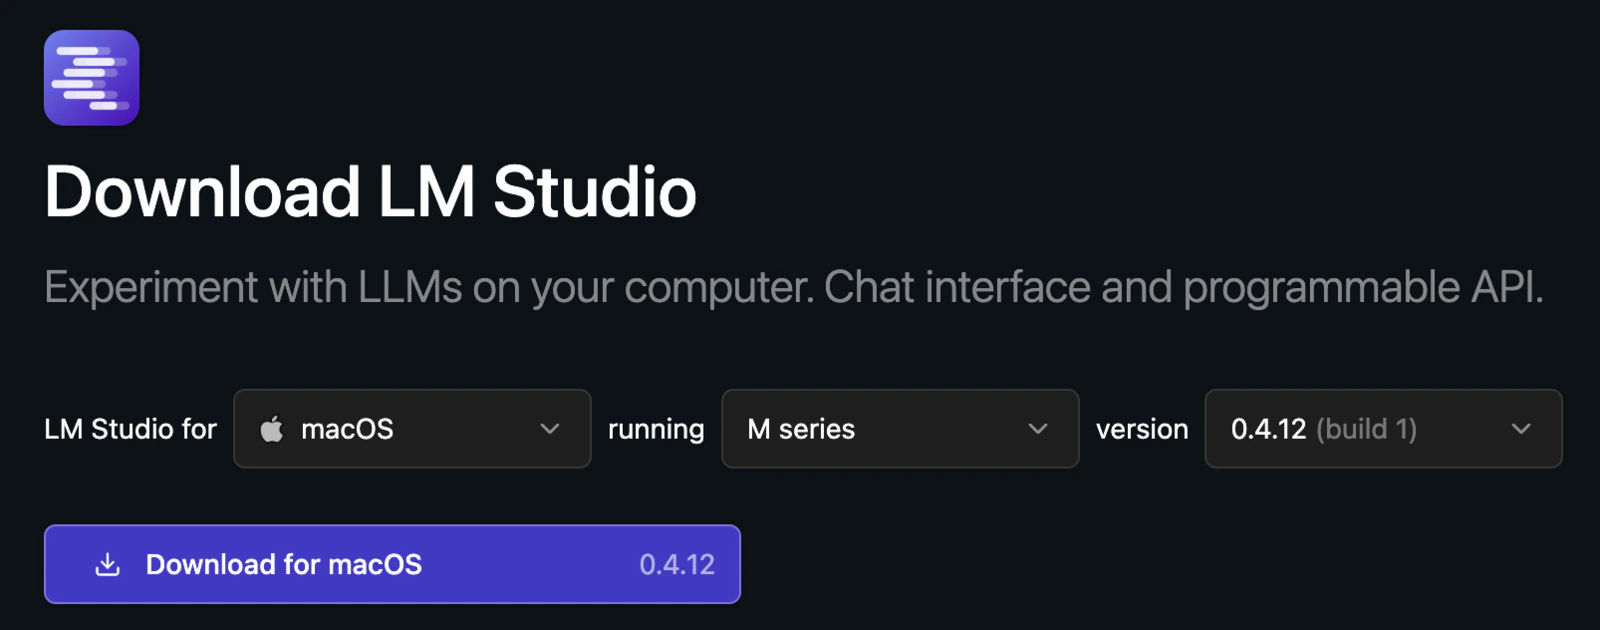
Go to [lmstudio.ai](https://lmstudio.ai) and download the build for your operating system.
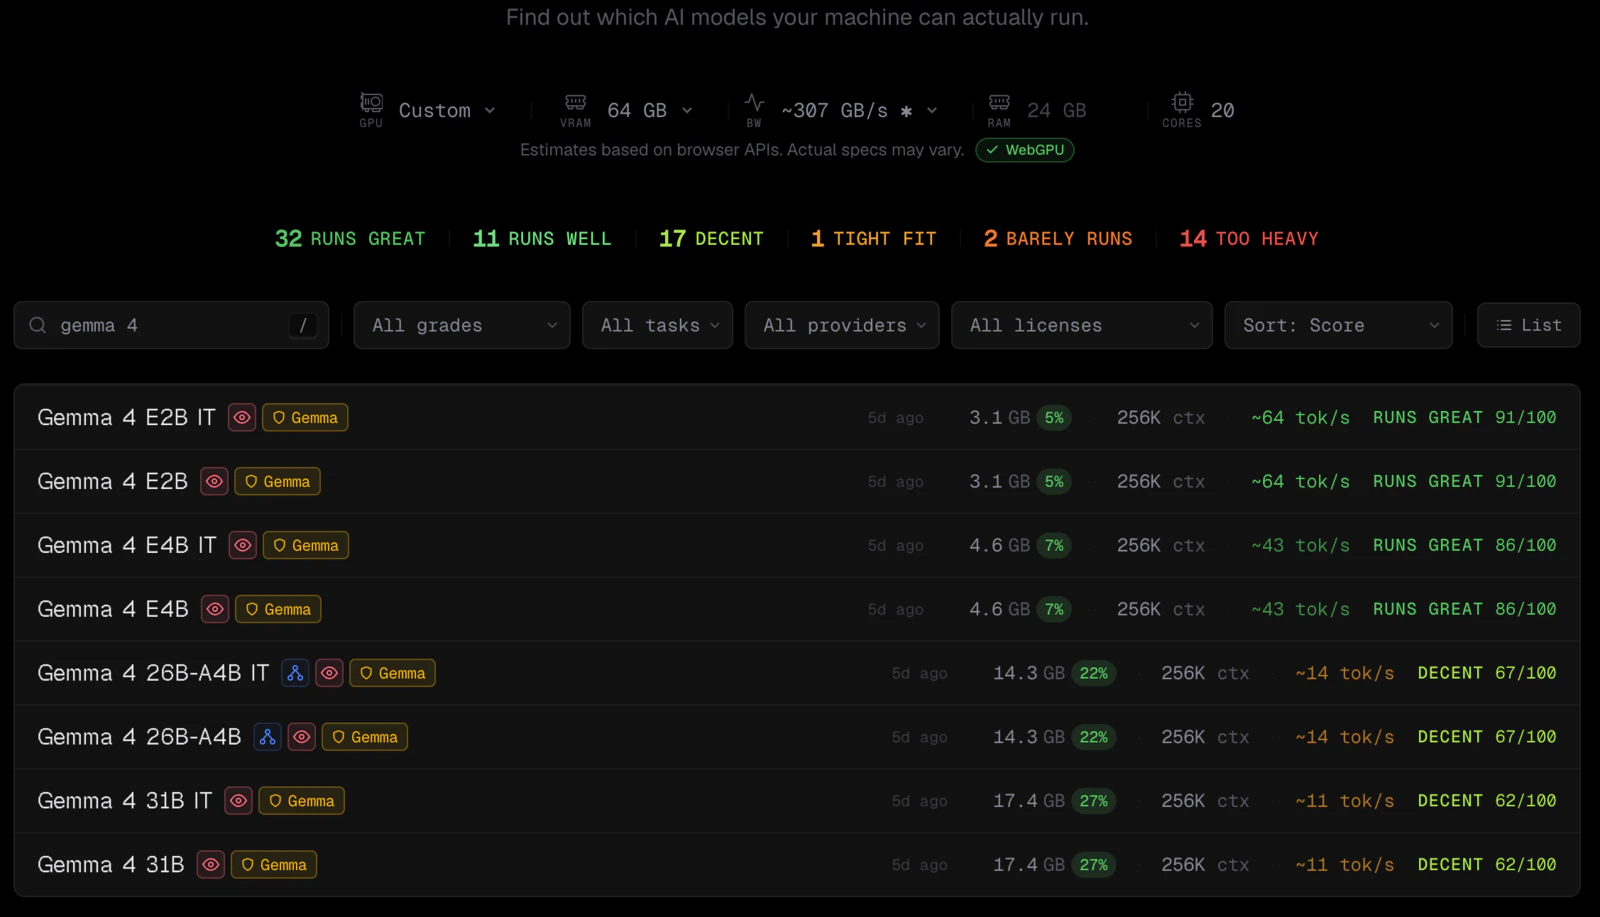
 Before downloading a large model, search for `gemma 4` on [canirun.ai](https://canirun.ai) and see which sizes are realistic for your hardware.
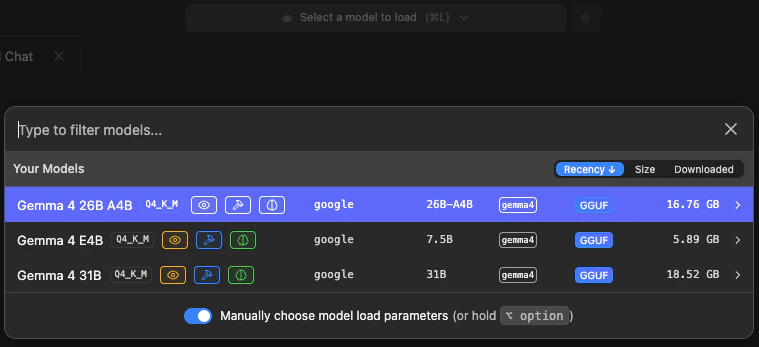
The little red eye icon marks models with **Vision** support, which is required for the Jumper workflow.
Before downloading a large model, search for `gemma 4` on [canirun.ai](https://canirun.ai) and see which sizes are realistic for your hardware.
The little red eye icon marks models with **Vision** support, which is required for the Jumper workflow.
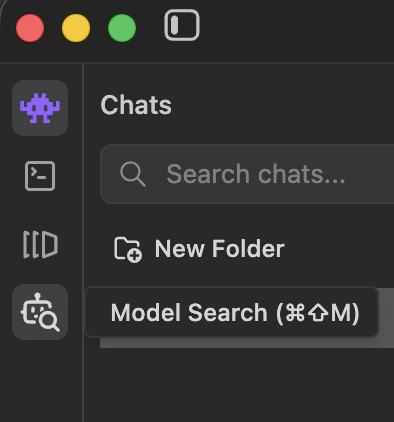
 Open LM Studio and click the robot icon in the left sidebar (**Model Search**).
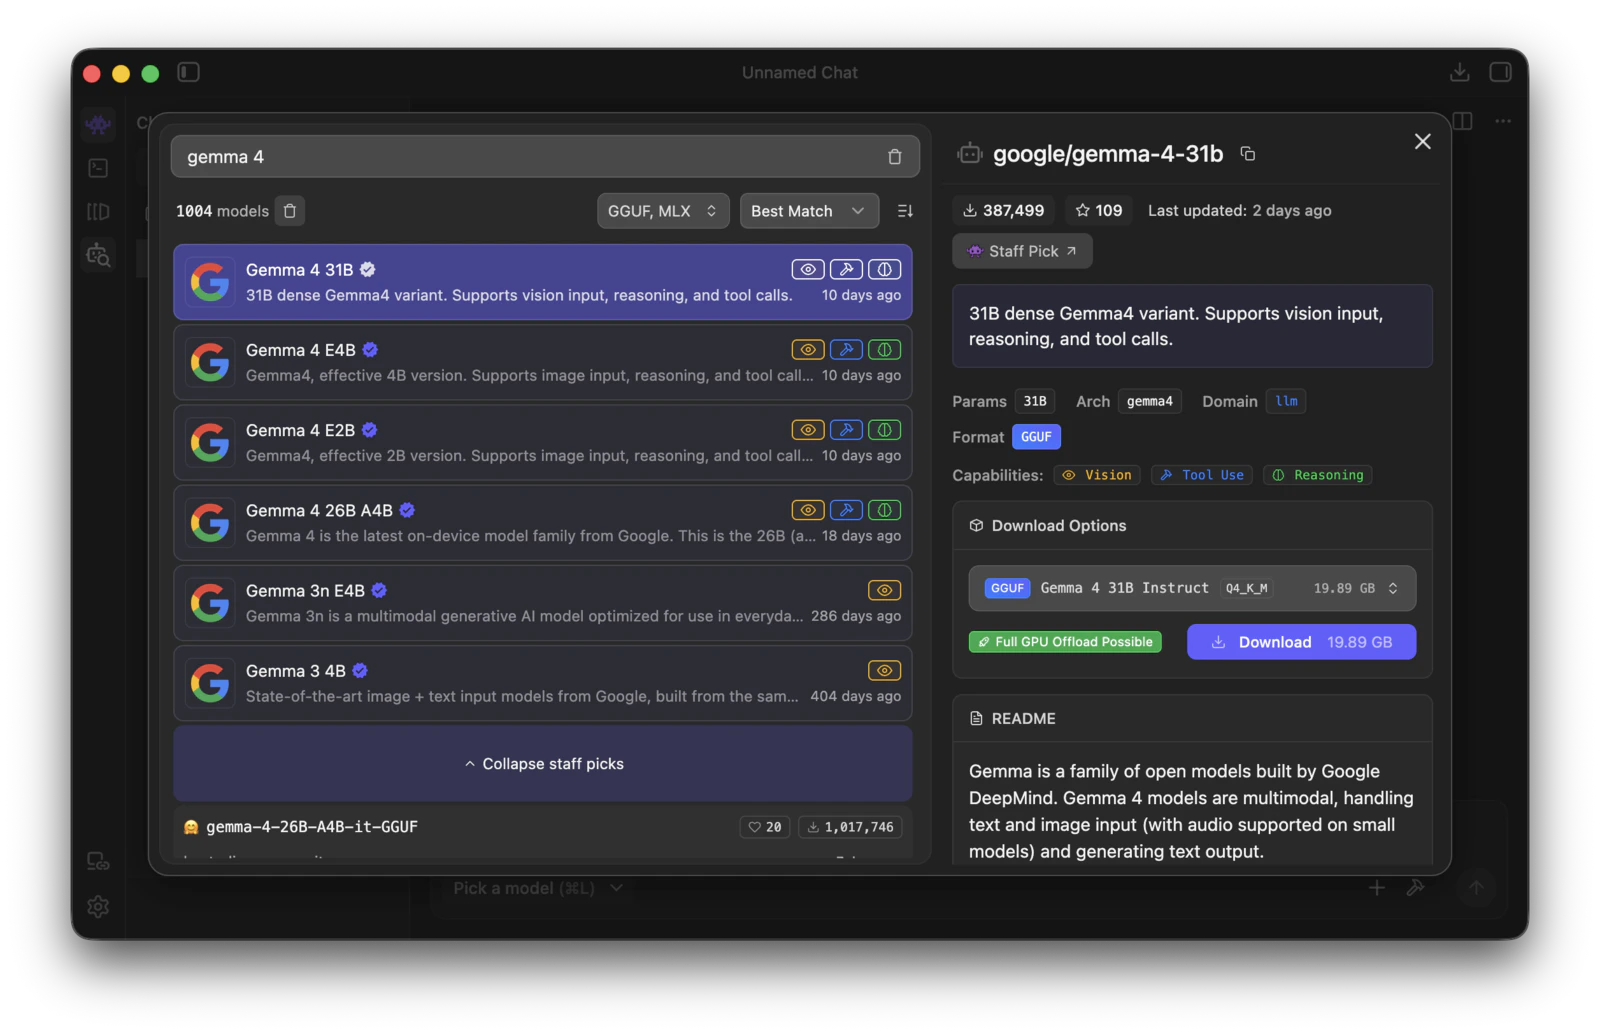
 Search for `gemma 4` and pick a model that shows the capabilities you want. For Jumper, **Tool Use** and **Vision** are the key capabilities.
 Once the download finishes, open the model picker, turn on **Manually choose model load parameters**, and then click the model you want to load.
 In the load settings view, you will most likely want to increase **Context Length**. In this example it is set to the maximum value, and **Remember settings** is enabled so you do not have to repeat this every time you load the model.
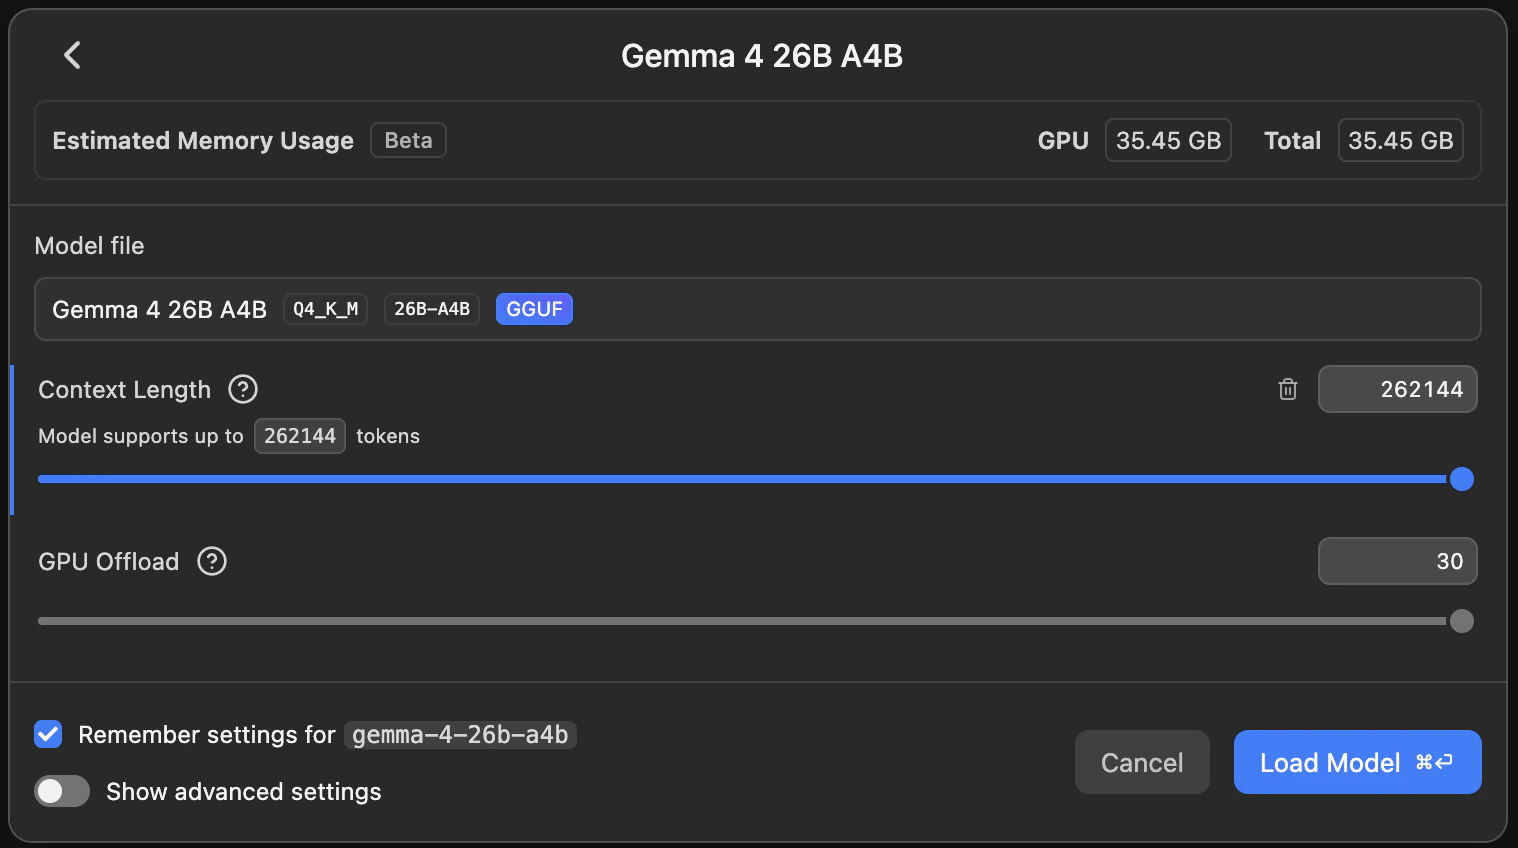 If the model is too slow, runs out of memory, or fails to load, lower the **Context Length** or move to a smaller model.
When you are happy with the settings, click **Load Model**.
In LM Studio chat, open **Integrations**, click the `+` menu, and choose **Edit mcp.json**.
If the model is too slow, runs out of memory, or fails to load, lower the **Context Length** or move to a smaller model.
When you are happy with the settings, click **Load Model**.
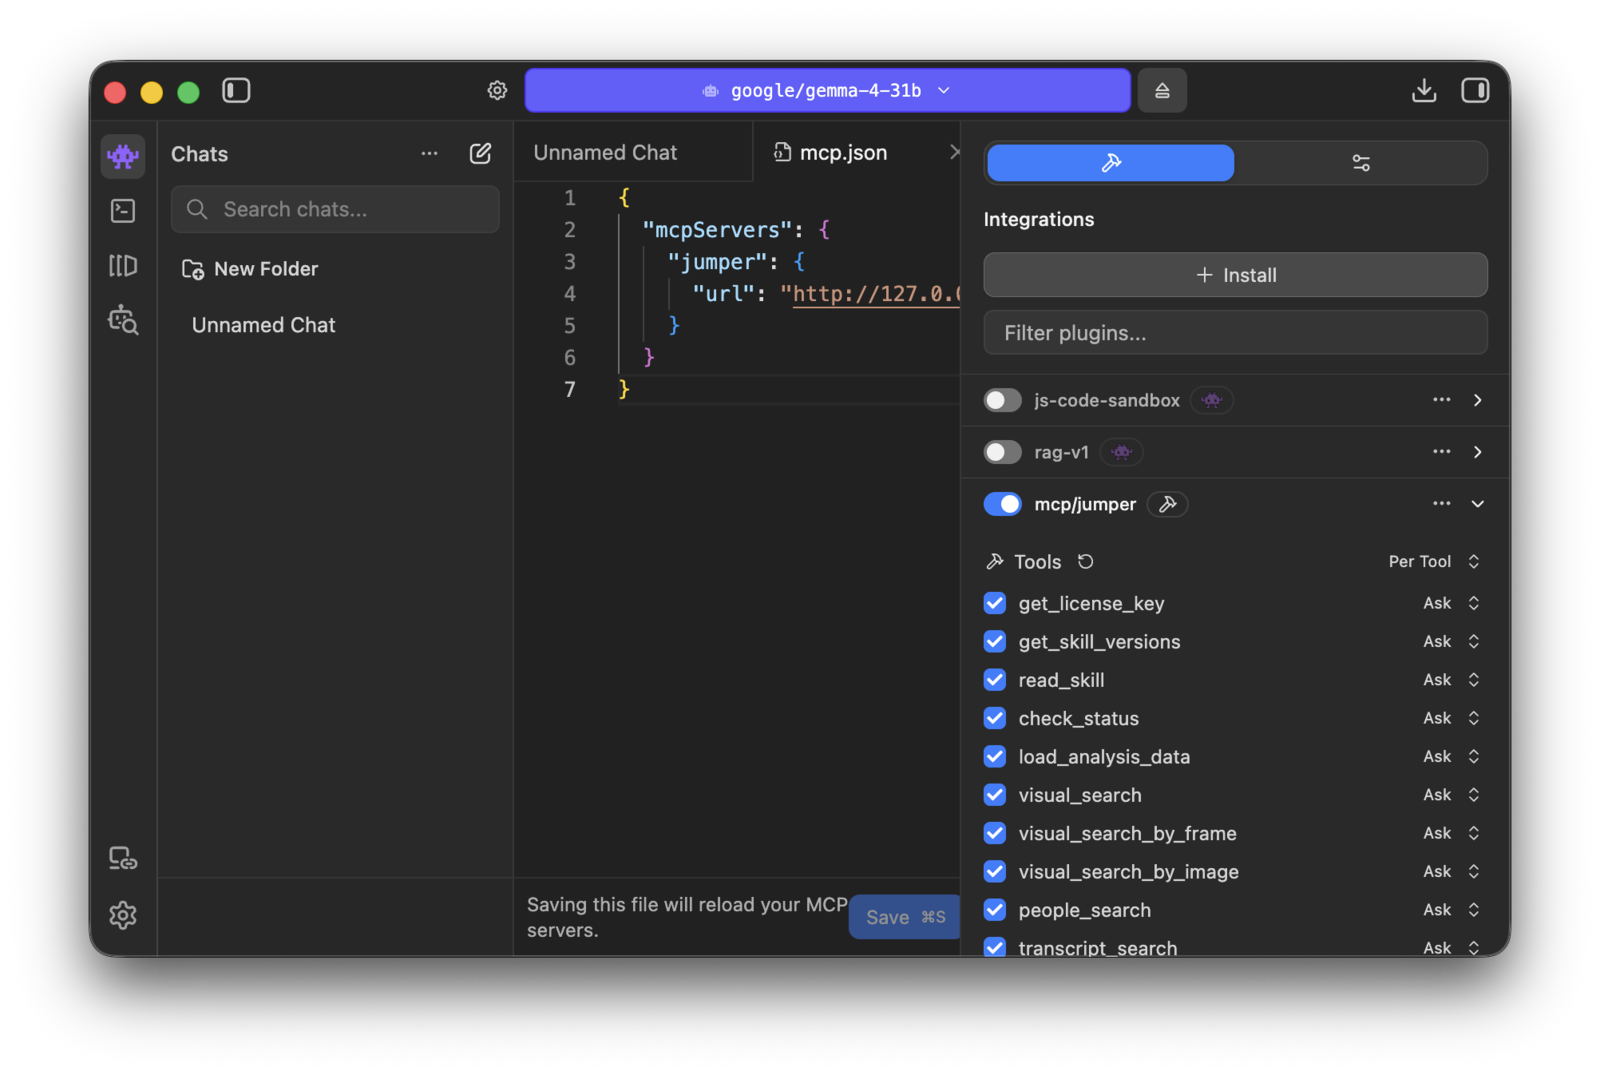
In LM Studio chat, open **Integrations**, click the `+` menu, and choose **Edit mcp.json**.
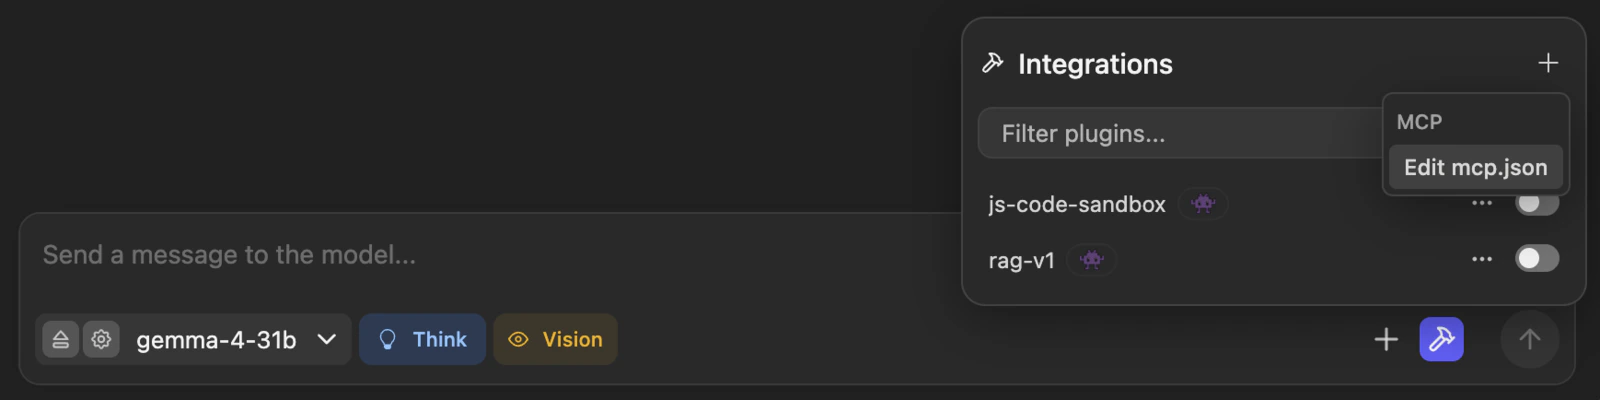 Add the Jumper server to `mcp.json` and save the file:
```json theme={null}
{
"mcpServers": {
"jumper": {
"url": "http://127.0.0.1:6699/mcp"
}
}
}
```
Add the Jumper server to `mcp.json` and save the file:
```json theme={null}
{
"mcpServers": {
"jumper": {
"url": "http://127.0.0.1:6699/mcp"
}
}
}
```
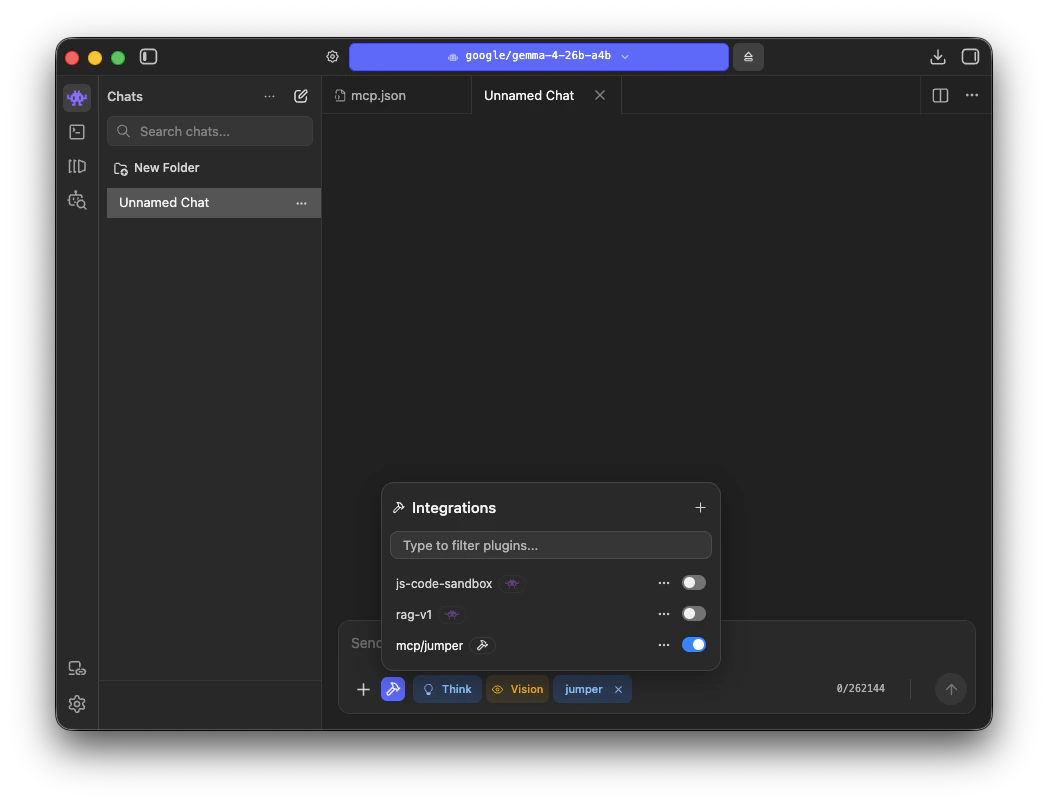
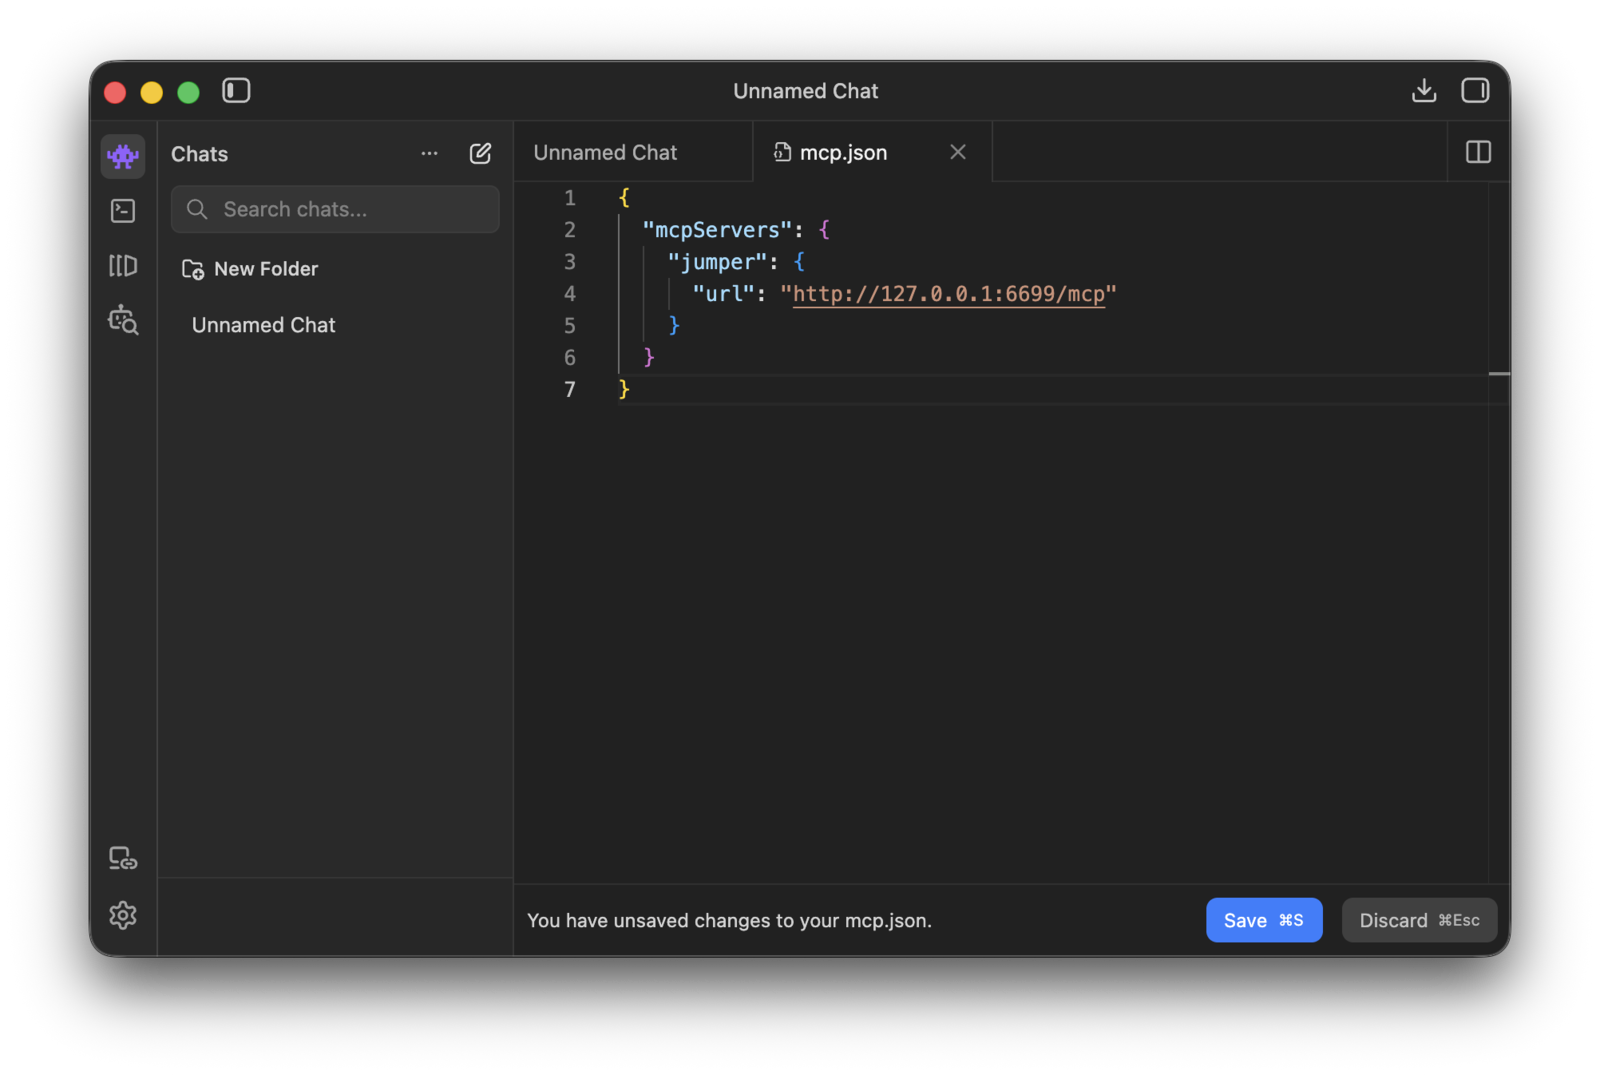 After saving, LM Studio reloads its MCP servers. Open **Integrations** and turn on `mcp/jumper`.
 Open or start a chat and confirm that `jumper` is attached in the composer before you send a prompt.
 Open the menu bar icon and choose **Start Server on Port 1234**.
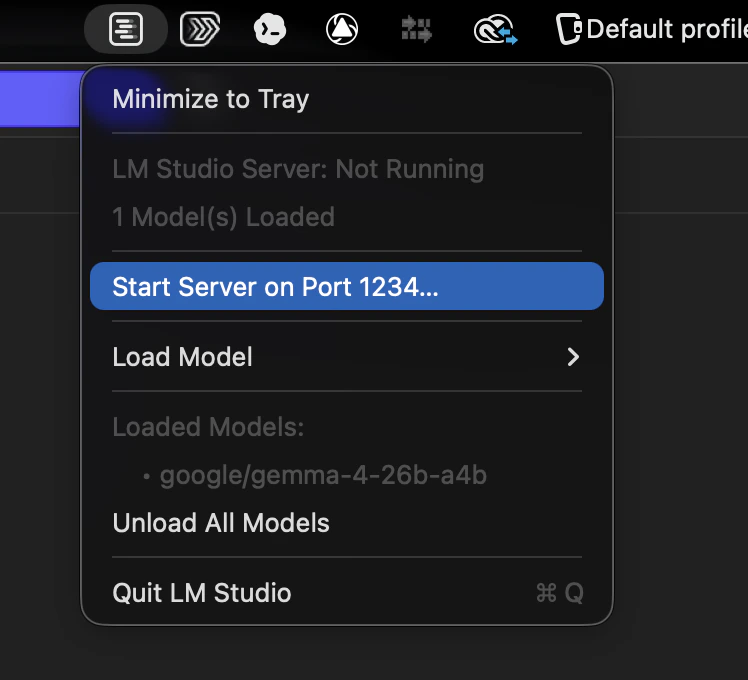 This step is required for a good Jumper workflow. LM Studio can talk to Jumper through MCP, but because of a current LM Studio limitation it cannot reliably inspect Jumper's result thumbnails directly inside the agent chat unless those images are manually pasted into the conversation.
With the local server running, Jumper can ask the loaded model to describe candidate frames in the background and pass those descriptions back to the chat. In practice, that means the agent can actually validate whether the returned shots are good matches instead of guessing from filenames, metadata, or search scores alone.
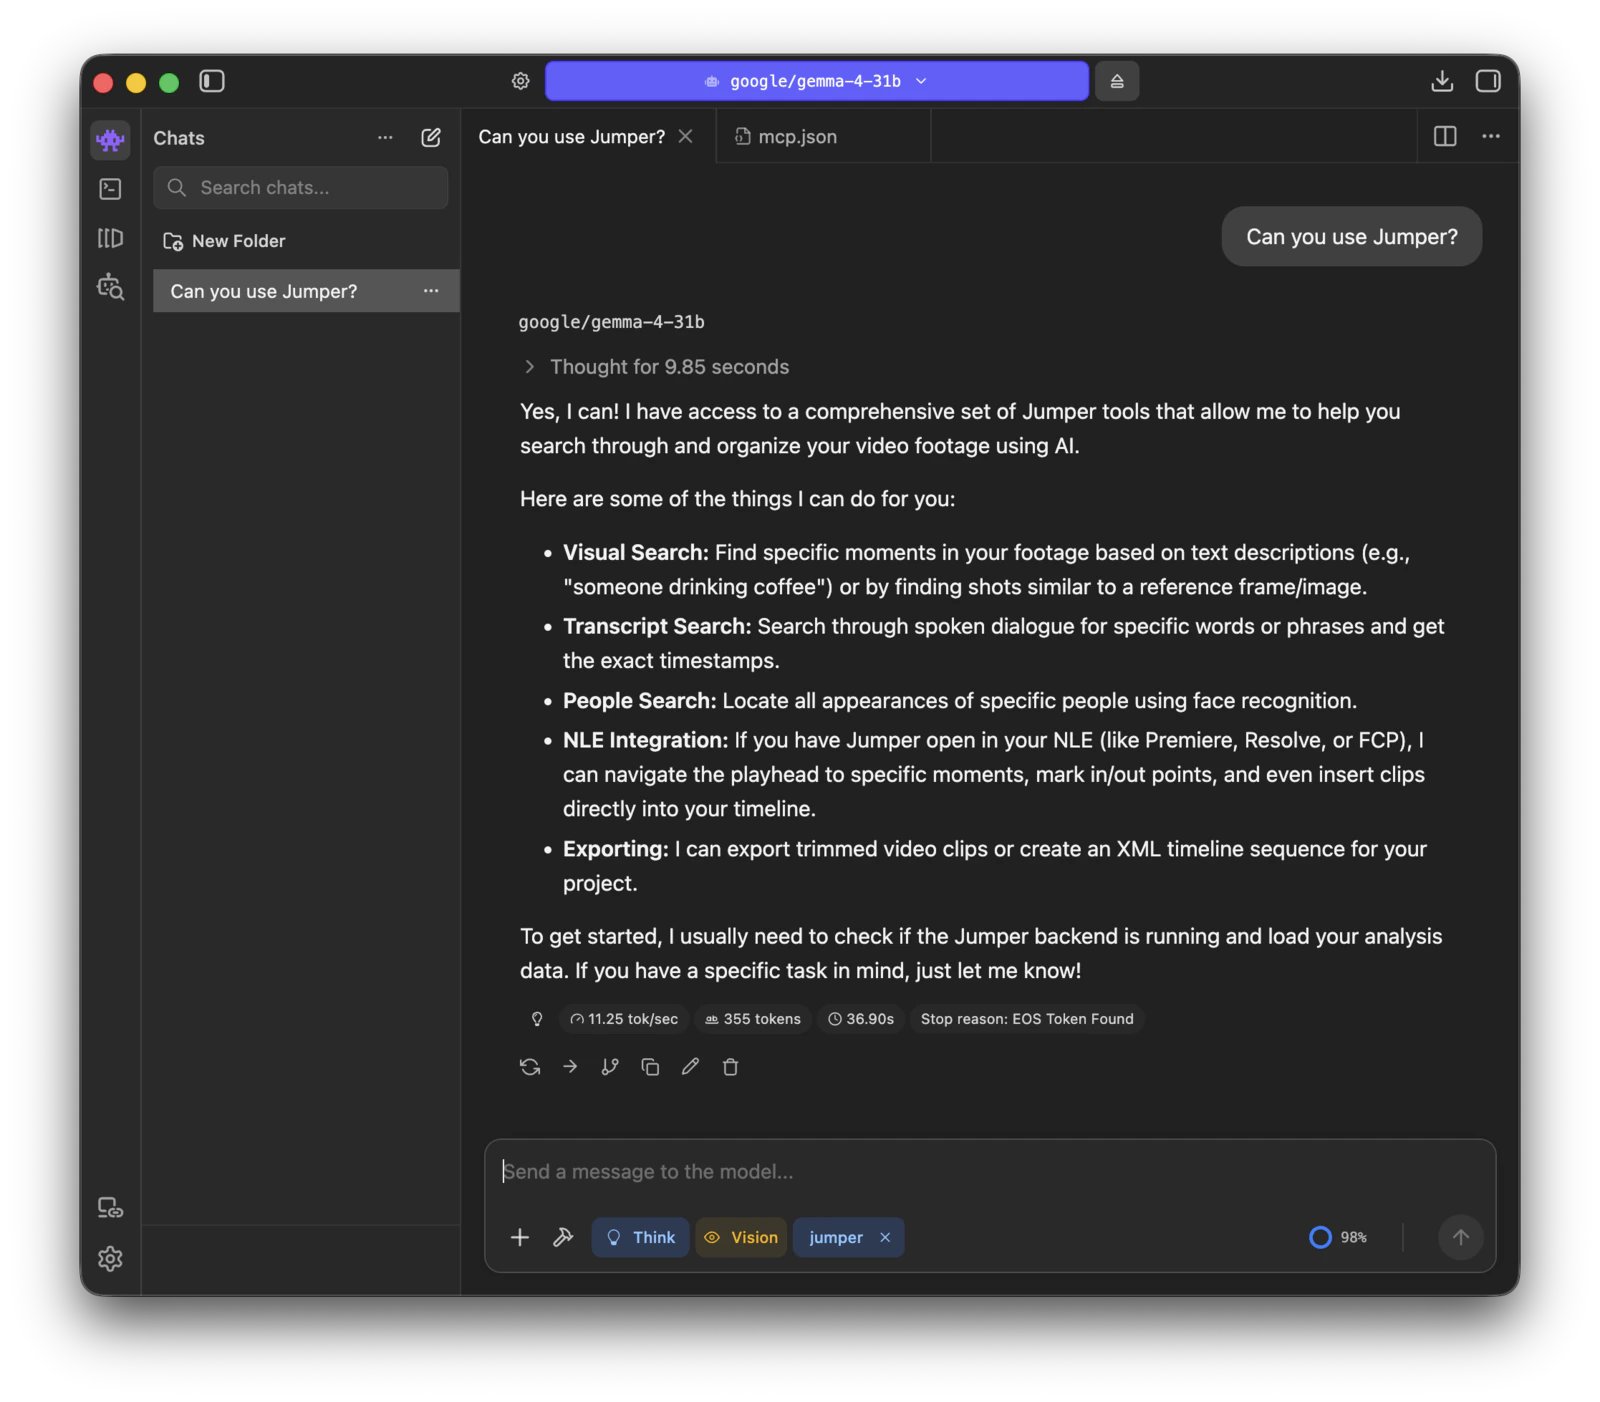
Ask a simple question like `Can you use Jumper?` or give it a real search request. A healthy setup should answer using the available Jumper tools instead of acting like it has no integration.
This step is required for a good Jumper workflow. LM Studio can talk to Jumper through MCP, but because of a current LM Studio limitation it cannot reliably inspect Jumper's result thumbnails directly inside the agent chat unless those images are manually pasted into the conversation.
With the local server running, Jumper can ask the loaded model to describe candidate frames in the background and pass those descriptions back to the chat. In practice, that means the agent can actually validate whether the returned shots are good matches instead of guessing from filenames, metadata, or search scores alone.
Ask a simple question like `Can you use Jumper?` or give it a real search request. A healthy setup should answer using the available Jumper tools instead of acting like it has no integration.
 ## Timeline workflows
With `mcp/jumper` enabled, LM Studio agents can also read timelines from Premiere Pro, DaVinci Resolve, and Avid Media Composer and send edited timelines back. See [Timeline import and export](/core-concepts/agentic-editing#timeline-import-and-export) for examples.
## Troubleshooting
* **`mcp/jumper` does not appear in Integrations**: Check that your `mcp.json` is valid JSON and that Jumper is running locally on `http://127.0.0.1:6699`.
* **The model behaves like it has no tools**: Make sure `mcp/jumper` is enabled in **Integrations** and that `jumper` is attached in the current chat composer.
* **The agent can search but does a poor job judging which shots are the best matches**: Make sure LM Studio's local server is running on `http://127.0.0.1:1234`.
* **The model is too slow or does not load**: Choose a smaller Gemma 4 variant or lower the context length in LM Studio's load settings.
## Related
Overview of how AI agents use Jumper through MCP
What stays local and what the model actually receives
## Timeline workflows
With `mcp/jumper` enabled, LM Studio agents can also read timelines from Premiere Pro, DaVinci Resolve, and Avid Media Composer and send edited timelines back. See [Timeline import and export](/core-concepts/agentic-editing#timeline-import-and-export) for examples.
## Troubleshooting
* **`mcp/jumper` does not appear in Integrations**: Check that your `mcp.json` is valid JSON and that Jumper is running locally on `http://127.0.0.1:6699`.
* **The model behaves like it has no tools**: Make sure `mcp/jumper` is enabled in **Integrations** and that `jumper` is attached in the current chat composer.
* **The agent can search but does a poor job judging which shots are the best matches**: Make sure LM Studio's local server is running on `http://127.0.0.1:1234`.
* **The model is too slow or does not load**: Choose a smaller Gemma 4 variant or lower the context length in LM Studio's load settings.
## Related
Overview of how AI agents use Jumper through MCP
What stays local and what the model actually receives