This feature requires a Jumper Pro license
Detecting faces in media
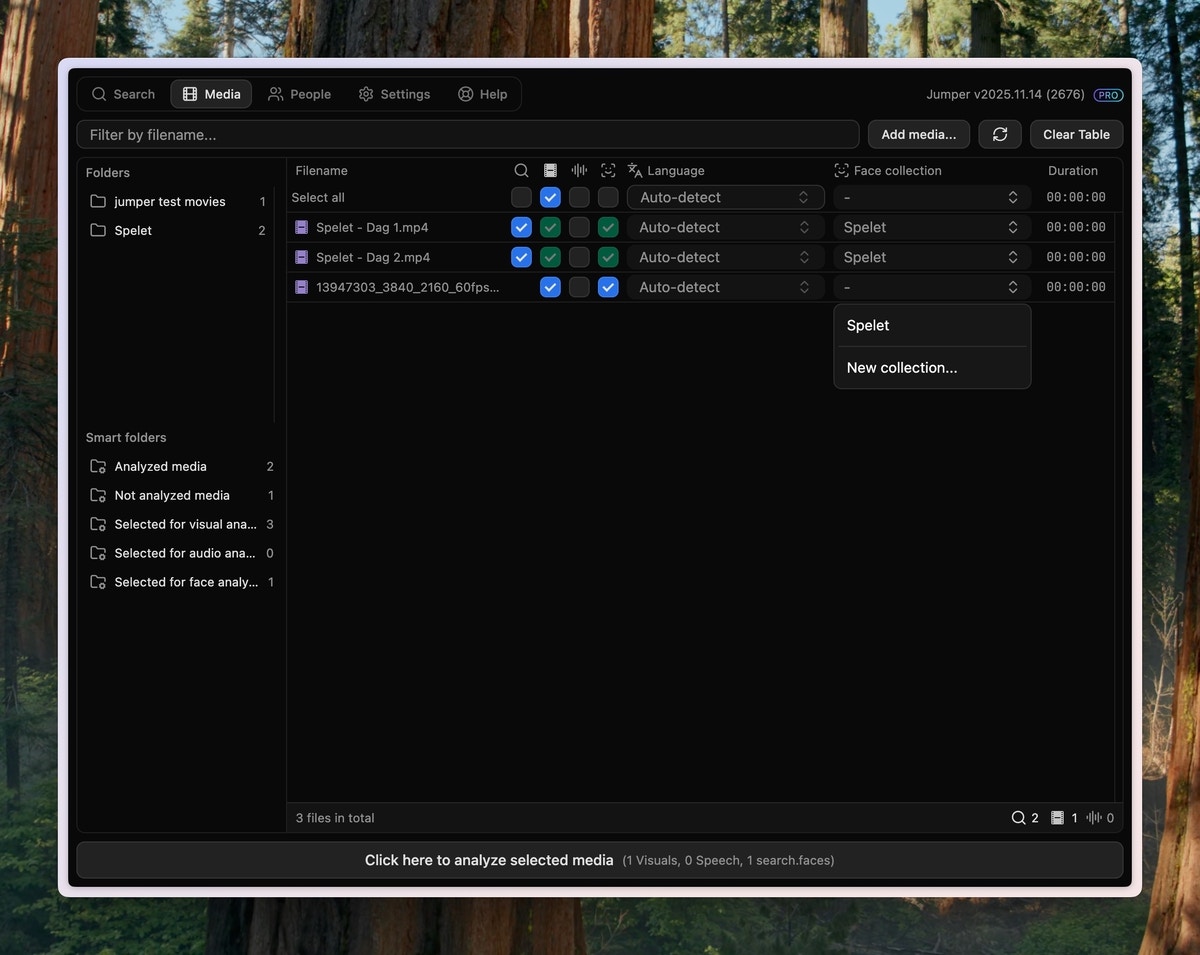
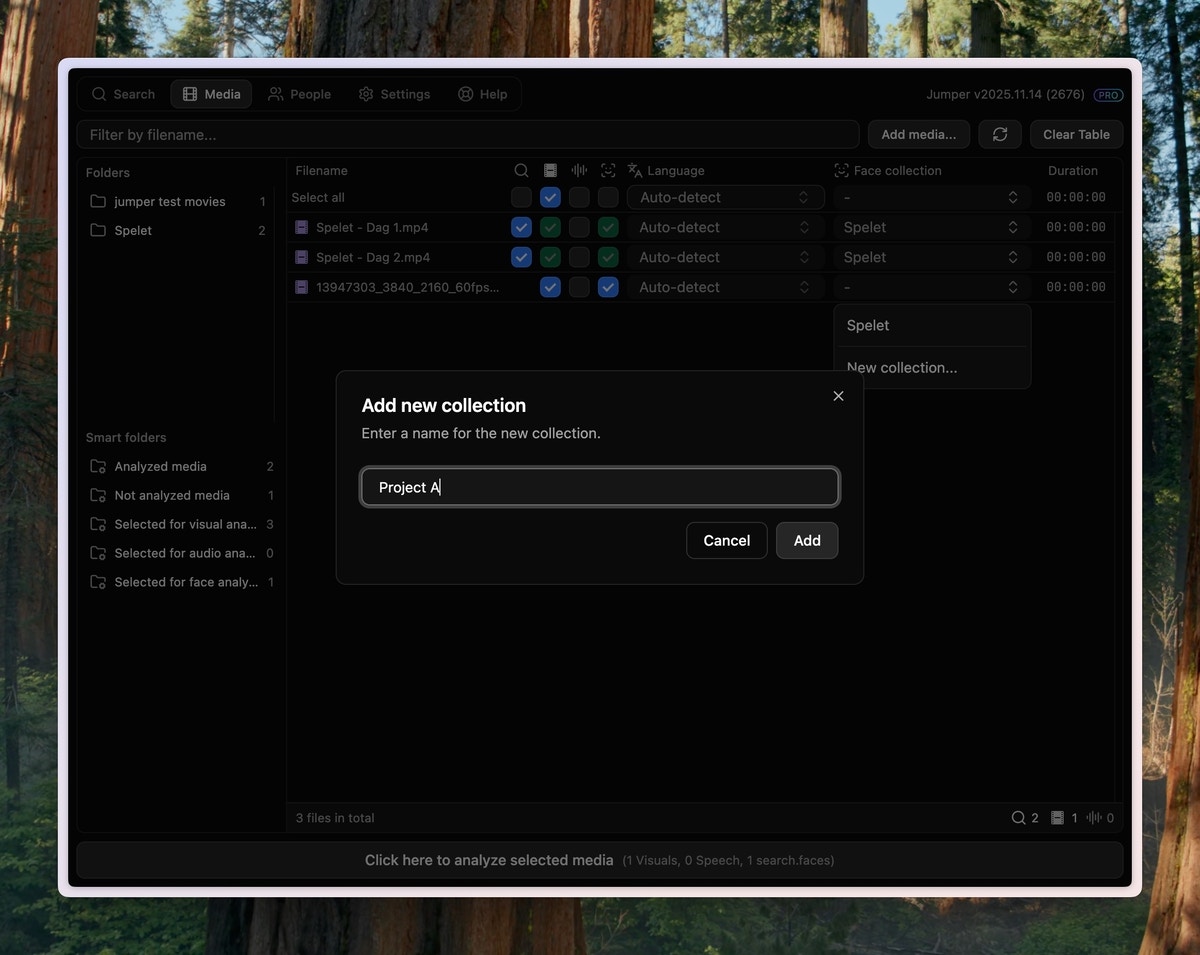
To detect faces in a media file, you need to mark the media file for face detection in the Media tab (tick the checkbox in theMark for face detection column) and choose a Collection to add the faces to.
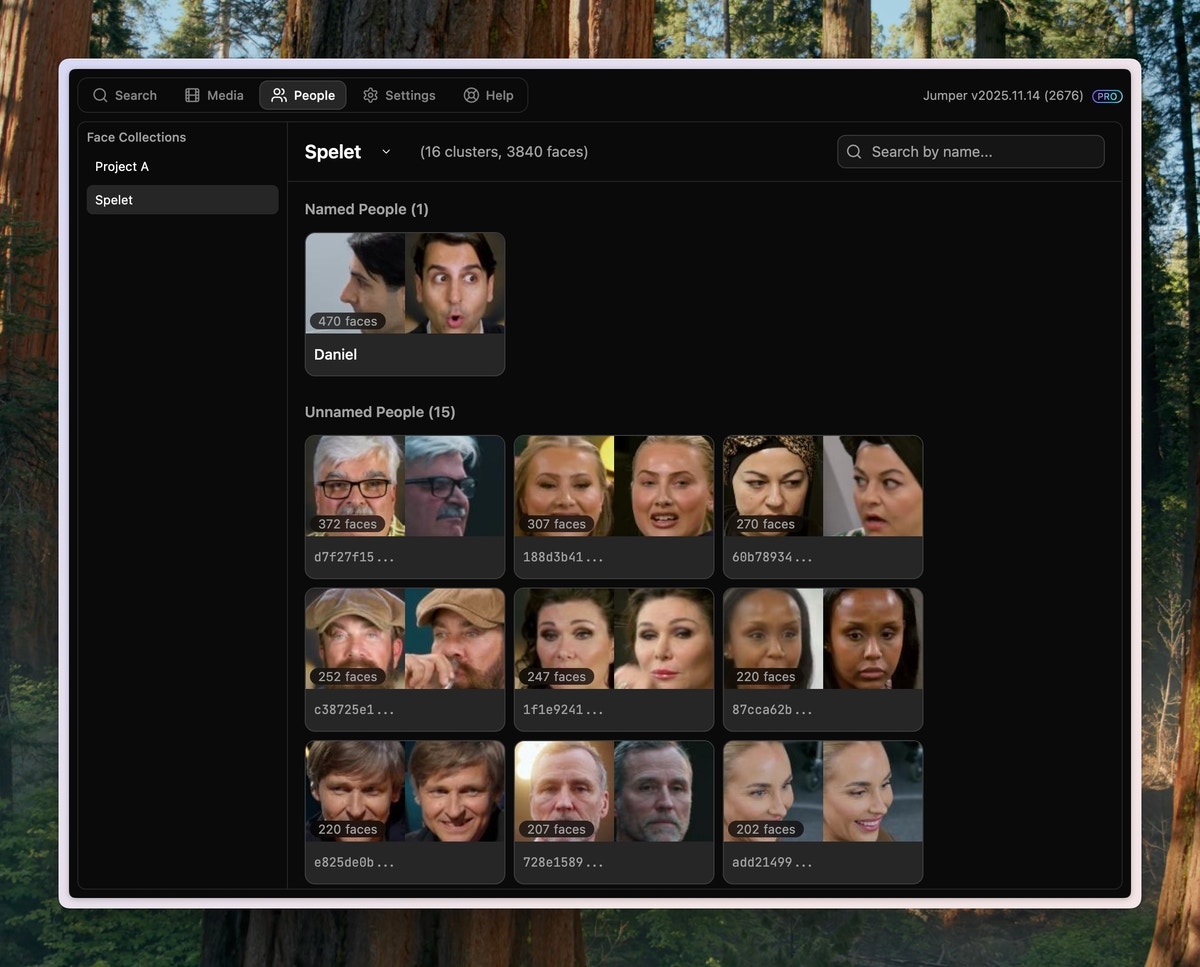
Viewing detected faces
Once the media file has been analyzed, you can see your collection of faces in the People tab. By default, all people are unnamed. With default settings, the People Grid shows all the people that occur in of footage.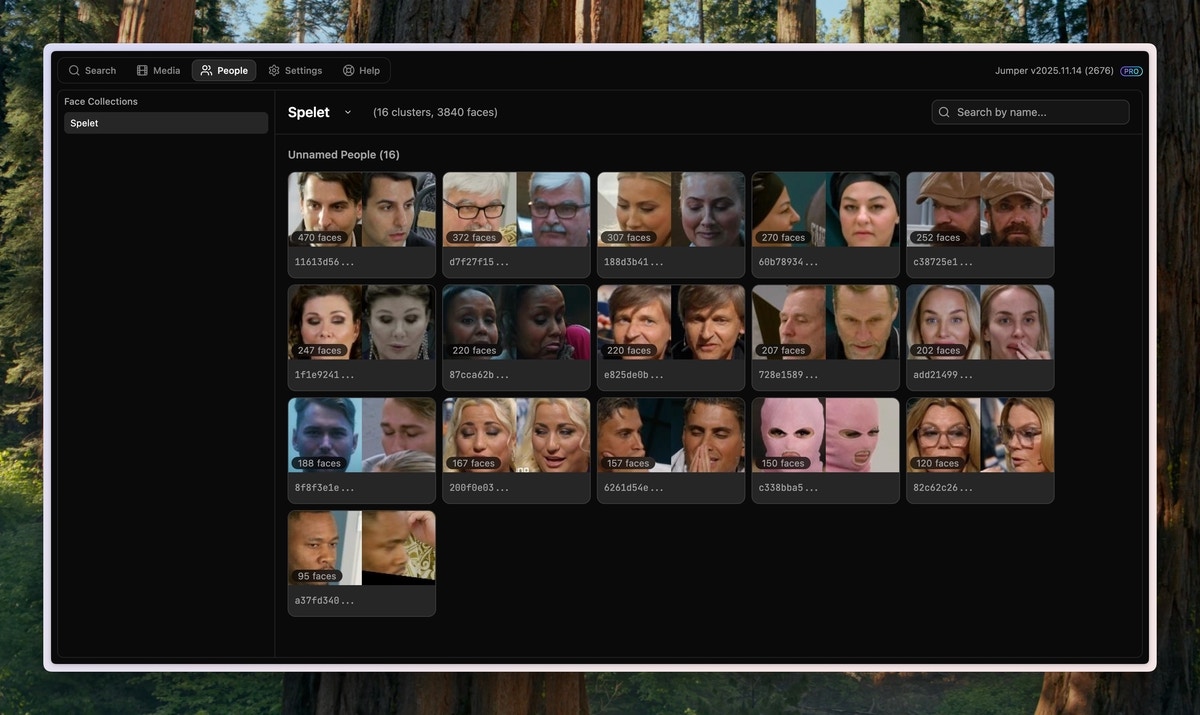
Naming people
To assign a name to a person, click the name field and type the name.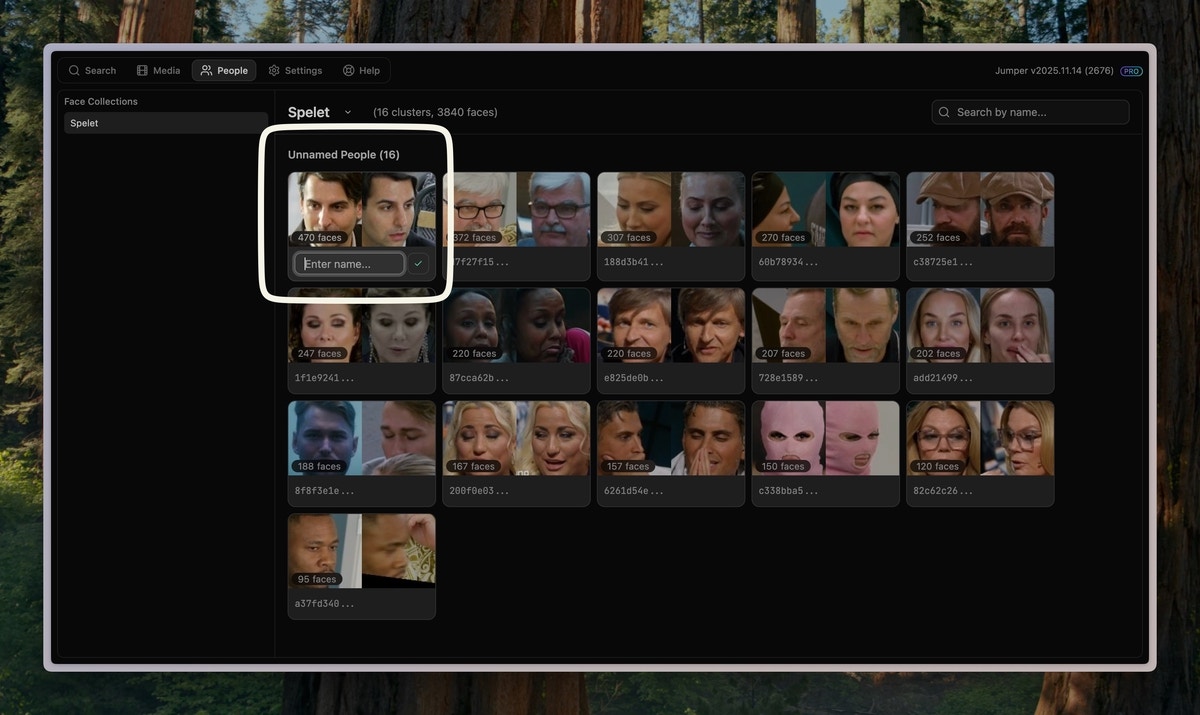
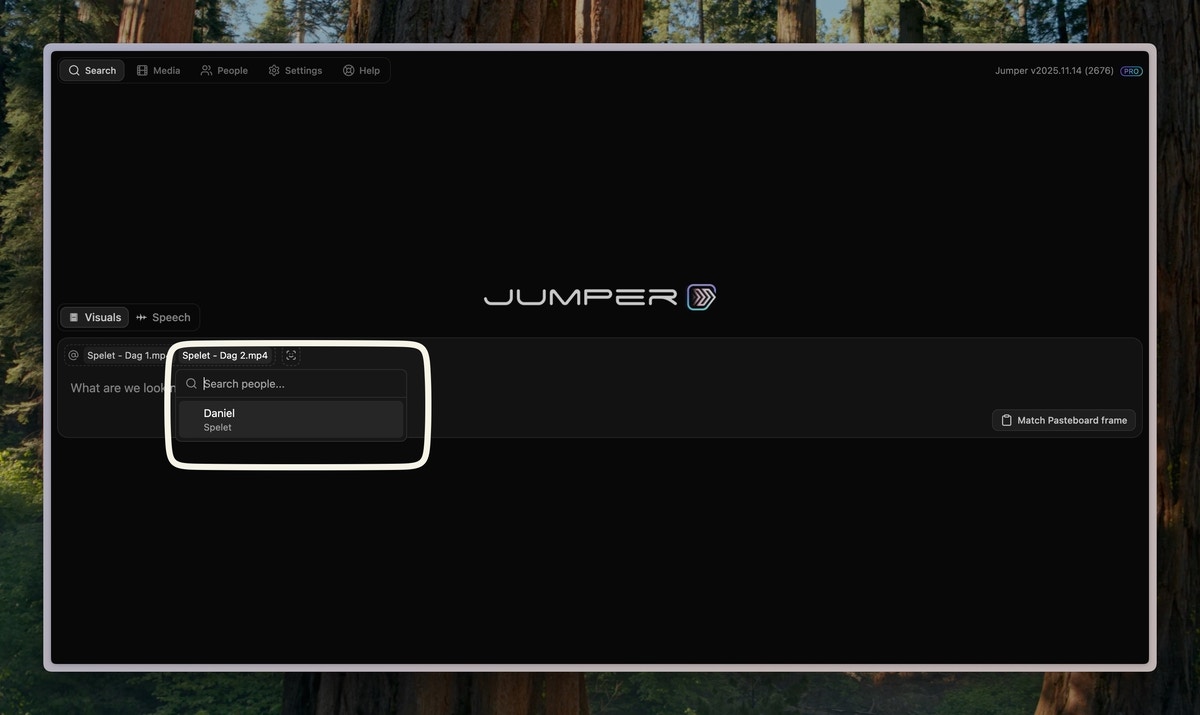
Searching for people
To search for a person, click the Face icon button to bring up a list of all named people and select the person you want to search for.Pro tip: You can also type ’@’ in the search bar to bring up the People dropdown.
Multi-person search
Select multiple named people from the Face search control to narrow results by cast or interview participants.
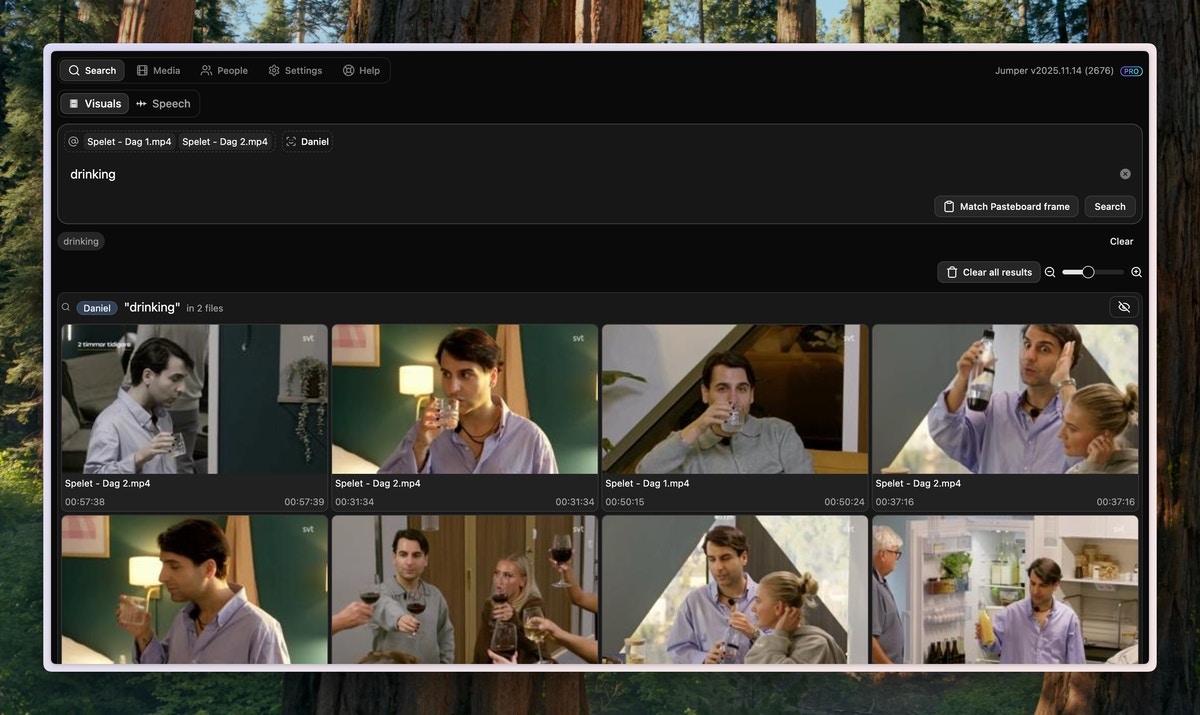
Combine people filters with a visual search query. For example, select Anna and Ben with AND, then search for
walking outside to find exterior shots of both people together.
Merging groups
Occasionally, Jumper might create multiple groups for the same person. This is because the face detection algorithm might have low confidence in the detection. You can merge any group with any already named person by clicking the button on a group and selecting the person you want to merge it with.Regrouping faces
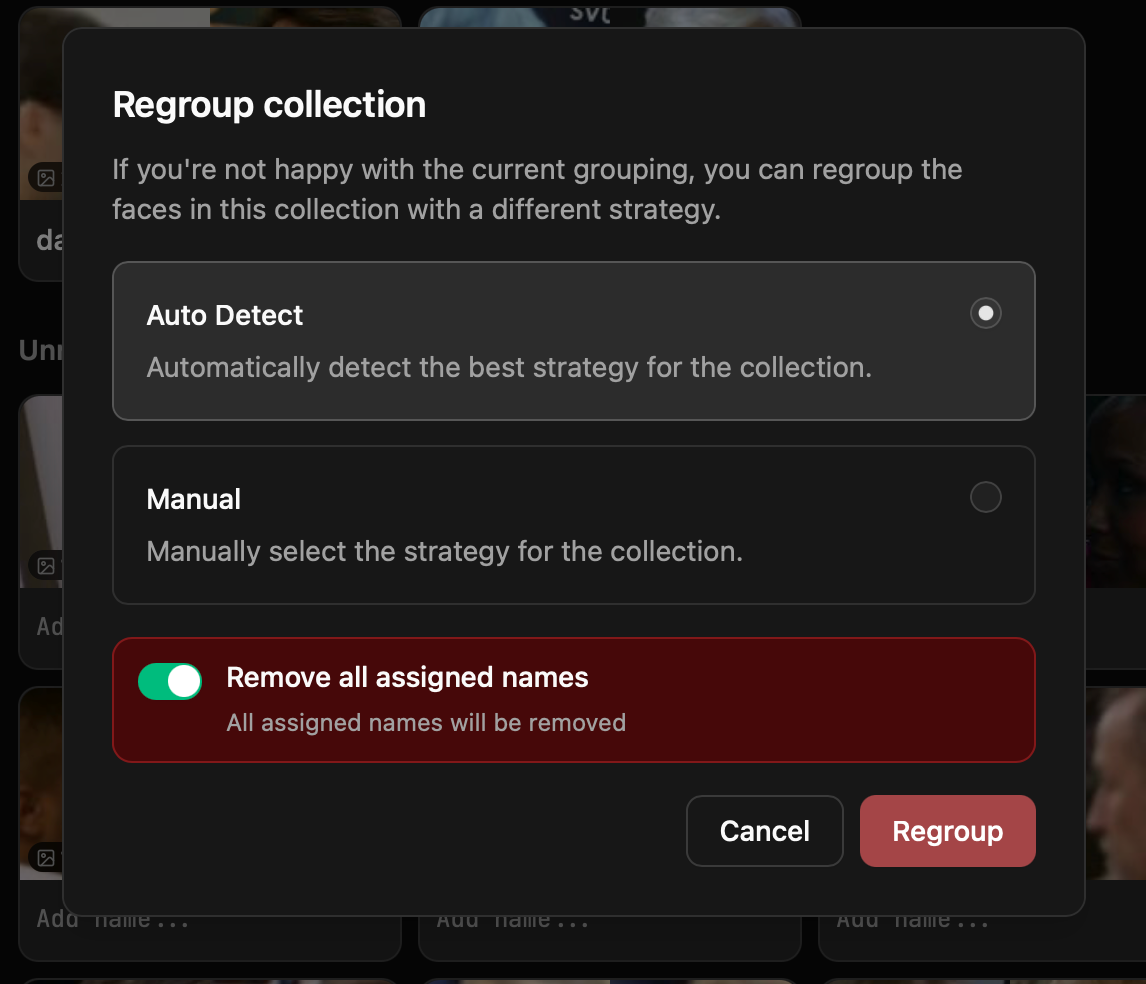
If you are not happy with the grouping of the faces, you can regroup them with different parameters to improve the accuracy of the grouping. You can regroup faces by clicking the ellipsis button () next to the collection name and selectingRegroup in the People tab.
A looser setting collects more appearances of the same person but risks mixing people who look alike. A stricter setting keeps people apart but may split one person into several groups, which you can fix by merging groups.
Remove all assigned names
You can choose whether to preserve existing names when regrouping:- Off (default): Already assigned names will be preserved. Only unassigned faces will be regrouped.
- On: All assigned names will be removed before regrouping. This gives you a fresh start with the new grouping strategy.
Regroup button. Regrouping will typically not take very long to complete, a few seconds to a minute depending on the size of the collection.
Troubleshooting
A person I know is in the footage does not show up in the People tab
A person I know is in the footage does not show up in the People tab
This could be because the person got grouped with another person. Regroup the collection at a stricter level ( -> Regroup, then Very Strict or Ultra Strict) to improve the accuracy of the grouping.
There's a group with a lot of different people in it
There's a group with a lot of different people in it
Regroup the collection at a stricter level ( -> Regroup, then Very Strict or Ultra Strict) to separate people who look alike.