Visual Search
1
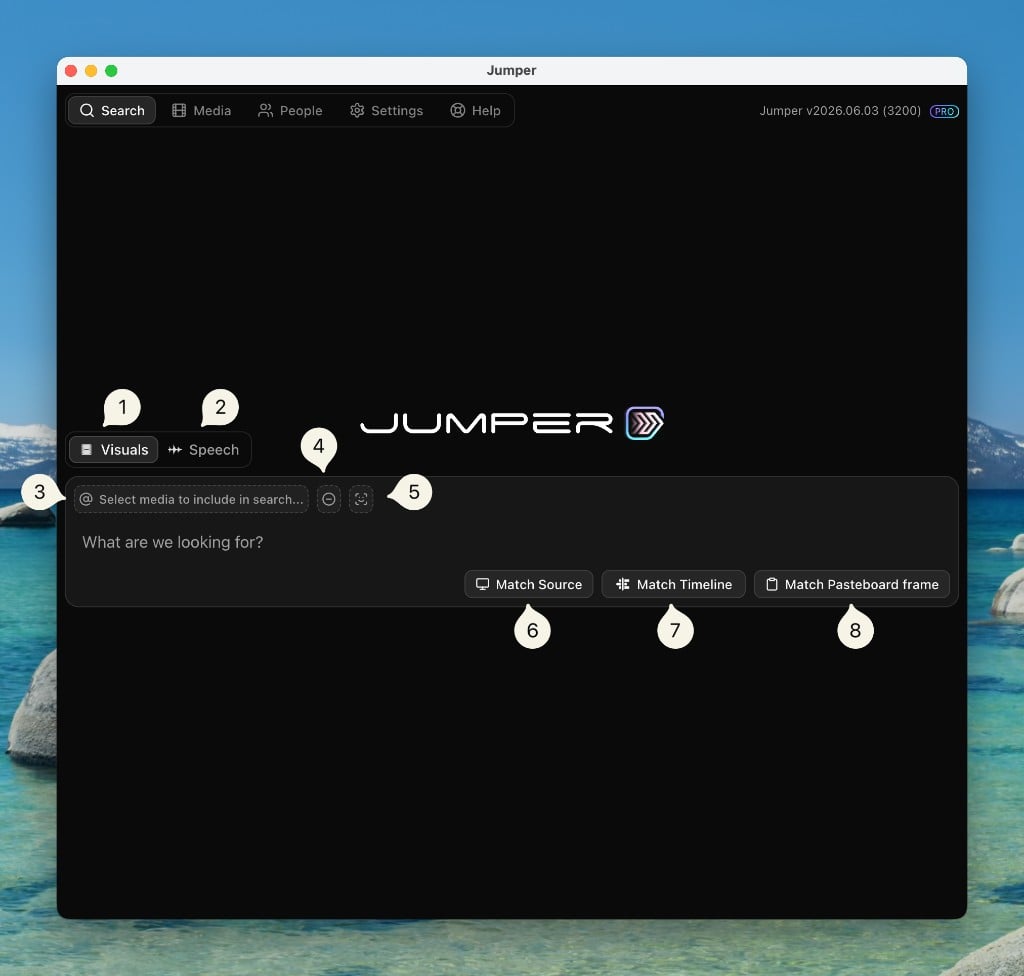
Visuals
Switch to Visual search. Search by describing what you see or matching a frame.
2
Speech
Switch to Speech search. Search by word or phrase in transcribed dialogue.
3
Select media
Choose files or bins to include in your search. See Context Picker.
4
Exclude search term
Add one or more terms to exclude from your search. For example, search for
people talking but exclude meeting room. See Exclude search terms.5
Face search
Select one or more named people to search for. Opens a list of people from your Collections. You can also type
@ in the search box to bring up the People dropdown. With multiple people selected, use the AND/OR control to require every person in the same frame (AND) or match any selected person (OR). See Face detection and Searching for people.6
Match Source
Takes the frame currently visible in your editing software’s Source Monitor (or Event Viewer in Final Cut Pro) and performs a search with it.
7
Match Timeline
Takes the frame currently visible in your Timeline Monitor (or Timeline Viewer in Final Cut Pro) and performs a search with it.
8
Match Pasteboard frame
Takes the image currently in your and performs a search with it.
Exclude search terms
To exclude terms from your search, open the exclude dropdown and enter one or many terms. Jumper will penalize results that match the excluded terms. Example: Search forpeople talking and exclude meeting room to favor interviews and casual conversations over conference-room setups.
The exclude control is in Visual search only. It does not apply to Speech search.
1
Add terms
Open the exclude dropdown and type a term, such as
meeting room or outdoor. Add as many terms as you need.2
Select active terms
Choose which terms apply to the current search. You can turn individual terms on or off without deleting them.
3
Set the bias strength
Use the slider to control how strongly excluded concepts are pushed down in the results. A lower setting nudges matching shots lower. A higher setting penalizes them more heavily.
Visual Search result view
After performing a search, the results are shown in a grid below the search box.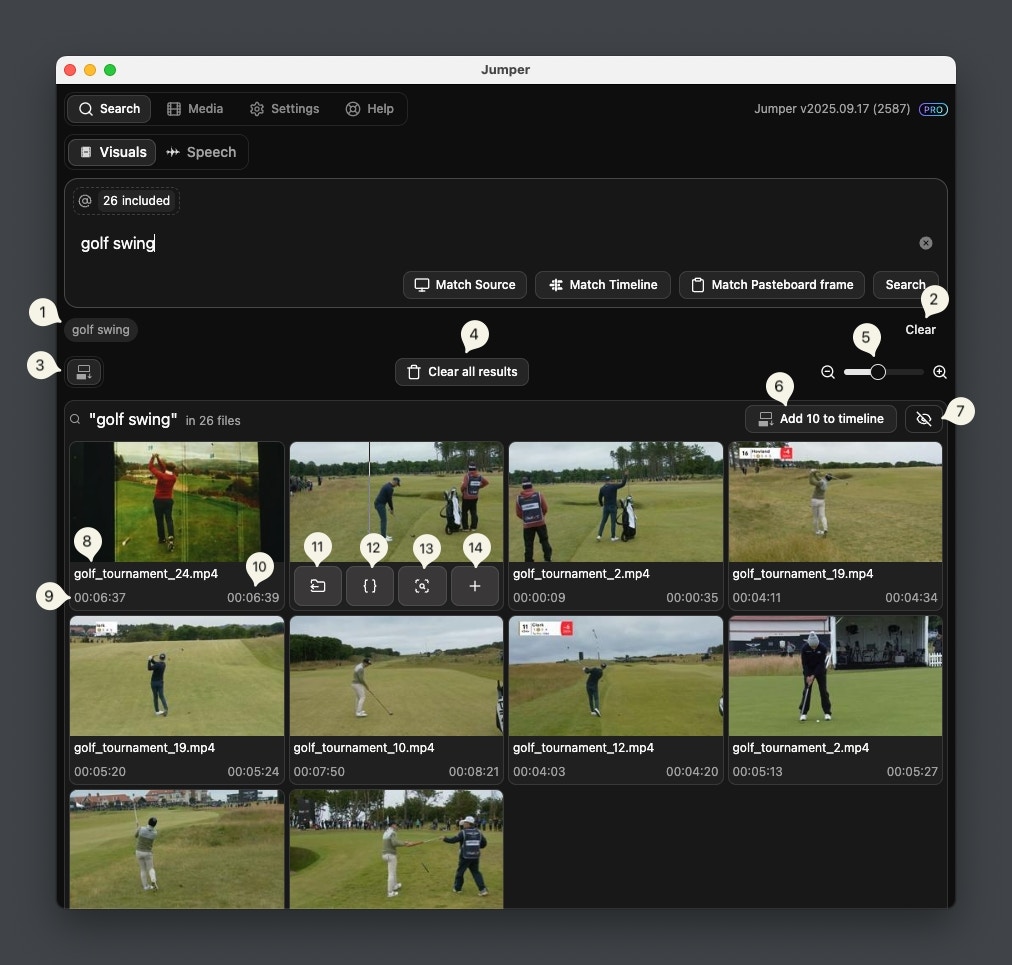
1
Search history
Shows a list of the last searches you have performed. Clicking on a previous query will perform a new search with the same parameters.
2
Clear Search history
Clears the search history.
3
Change insertion mode
Change the insertion mode (varies by editing software)
4
Clear all results
Clears the results of all previous searches.
5
Adjust thumbnail size
Adjust the thumbnail size of the results to fit more or less results on the screen.
6
Add all to timeline
Add all results from this search to your timeline with the selected insertion mode.
7
Hide result from history
Hide this search result from the search history.
8
Filename
The file in which the scene is found.
9
Timestamp of start of scene
The start time of the scene.
10
Timestamp of end of scene
The end time of the scene.
11
Show file in project
Click to open the file in the project.
12
Mark In/Out
Click to Mark the In/Out of the scene in the Source Monitor.
13
Find similar
Click to make a new search for scenes similar to this one.
14
Add scene to timeline
Click to add the scene to your timeline with the selected insertion mode.
Speech Search
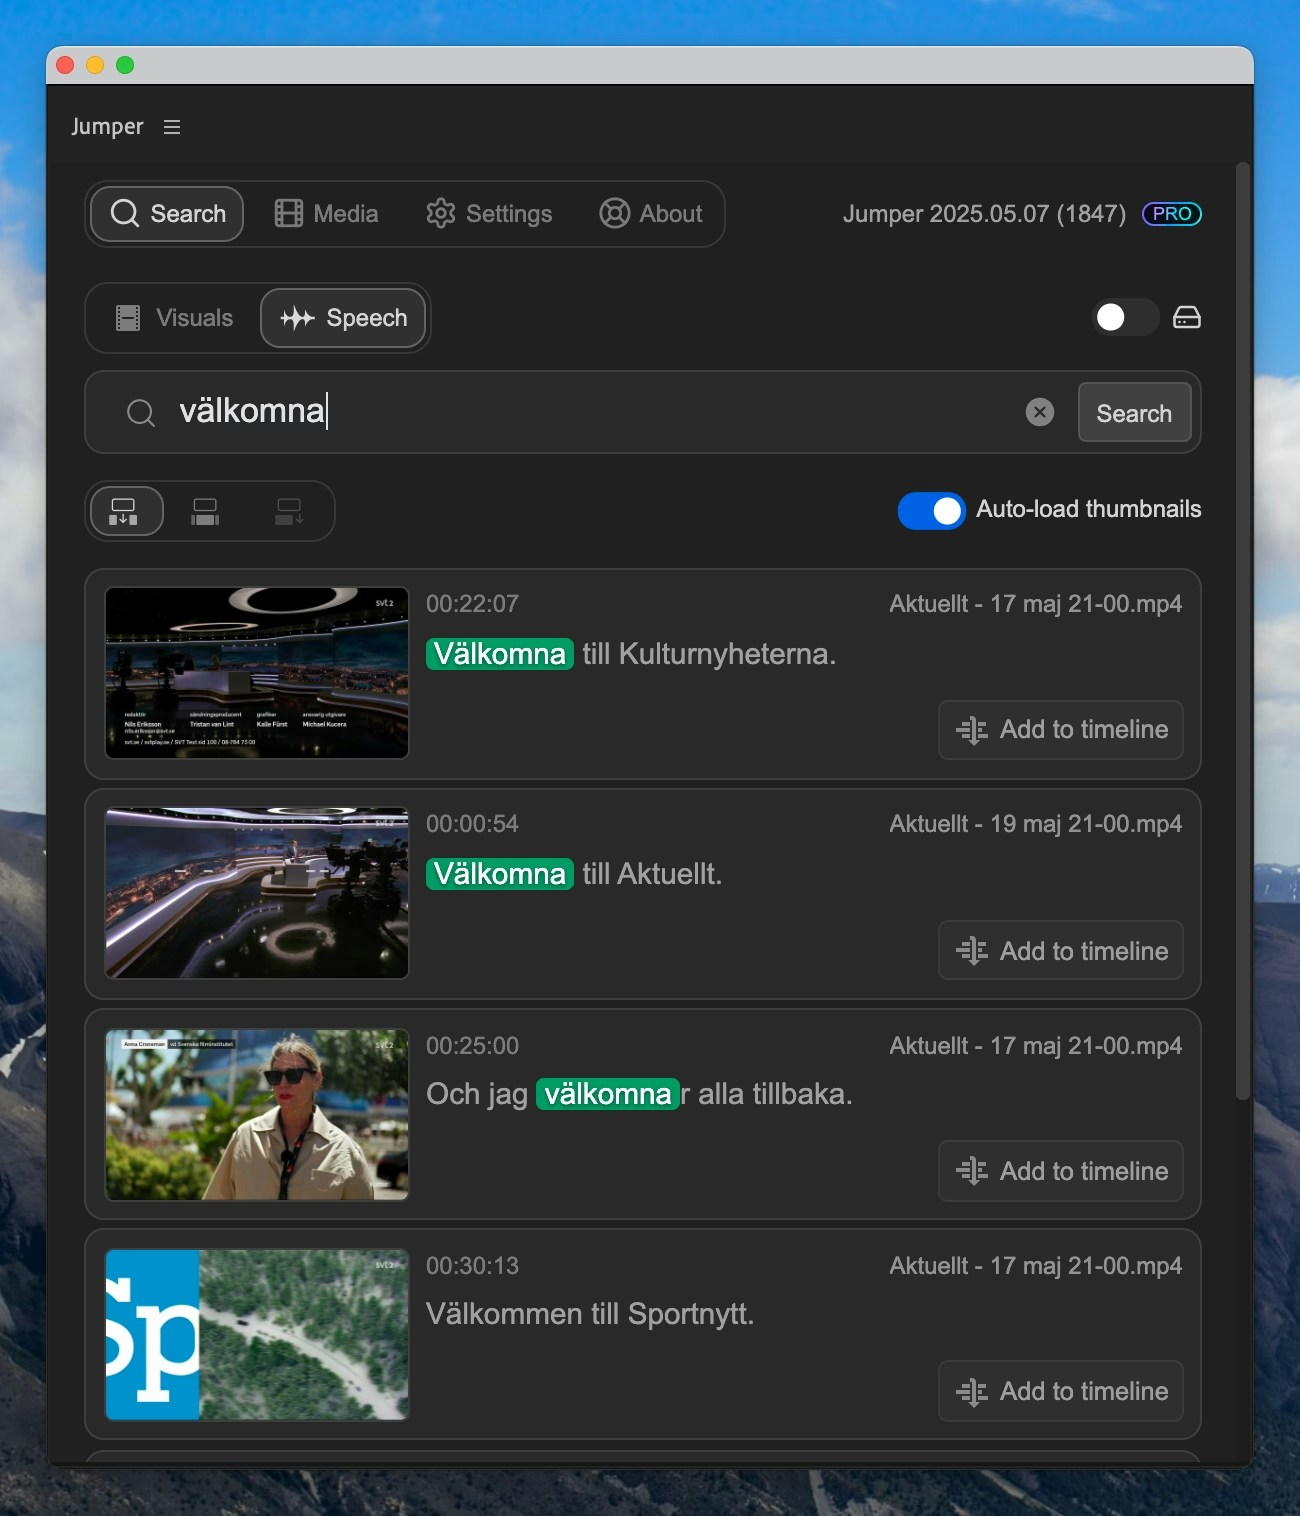
Add to timeline will add it to your timeline.
Show in script on a result opens the Script Editor for that file’s full transcription.
When speech is analyzed with speaker detection, you can filter speech search to a specific named speaker.
Export results (Standalone)
In Jumper Standalone, visual and speech search results include an export control. Use it to export trimmed subclips as video files, or export results as CSV. Exported subclips are saved to the directory set in Settings. NLE integrations use Add to timeline instead.Context Picker
The Context Picker is where you view and manage the context of your search, ie. the files and/or bins you want to search in. Here you can also toggle the Search All Analyzed Media option.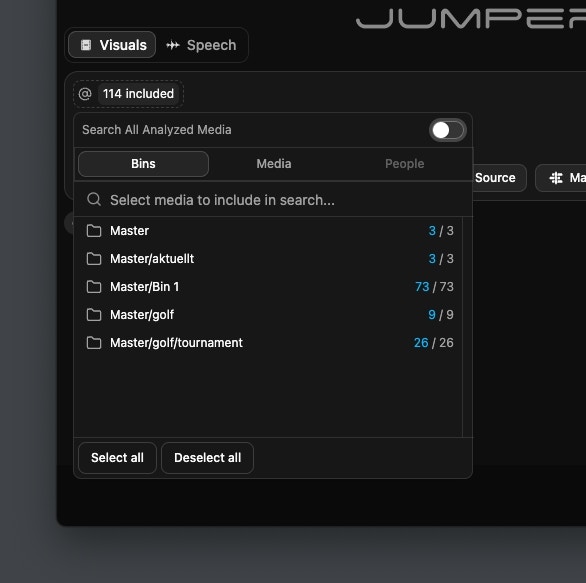
Search All Analyzed Media
If switched on, Jumper will search in any analyzed media you have, even if it’s not in the currently open project. Results from media outside of the current project have an amber background in the Result View.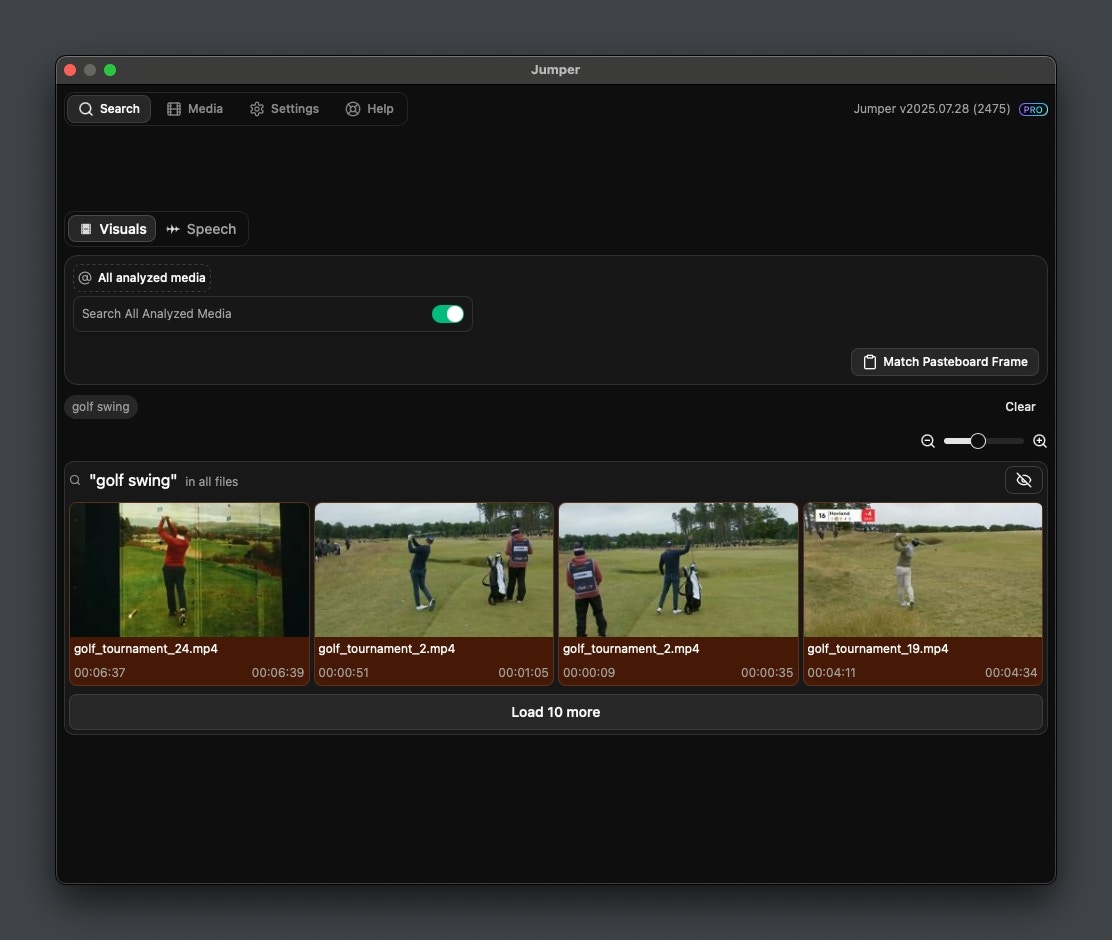
Tag filters
Tag filters narrow a visual search to the clips in one or more tag collections. Type# in the search box to open the tag filter, or click the tag button. Selecting multiple collections matches clips in any of them (OR).
Combine a tag filter with people search to search a curated set of clips for a specific person. Tag filters apply to visual search, not speech search.
For how to build and share collections, see Tag collections.