

Before you begin
- Jumper is running with media analyzed
- An AI agent (Claude or Codex) is connected
1
Give the agent a search query
Open your AI agent (Claude Code Desktop, Claude Code CLI, or Codex) and describe what you’re looking for in plain language. For example:Tell the agent which media to search if it matters (e.g. a specific folder path).
USER
okay use Jumper to search in
~/Downloads/jumper test movies/, I want a varied sequence with calm landscape shots and other nature related topics. Lets aim for 20 clips2
Review and approve the plan
The agent will run some checks, and then come back with a plan: which media it will search, the query it will run, and what it will export.Review the plan and approve it when you’re ready. The agent will then execute the search and export steps.In this case, we’ll ask the agent to export the clips to a folder.
USER
okay use Jumper to search in
~/Downloads/jumper test movies/, I want a varied sequence with calm landscape shots and other nature related topics. Lets aim for 20 clipsWorked for 10s
AGENT
Here’s my plan:Run multiple visual searches with varied queries across the folder:
- Calm water, ocean waves, beach
- Mountains, valleys
- Desert, dunes
- Sunrise, golden hour
- Village, countryside, pastoral
- Forests, trees, greenery
- Sky, clouds
- Export as timeline XML or export individual clips to a folder.
USER
lets export the clips to a folder
3
The agent exports clips to a folder
The agent uses Jumper to search your analyzed media, finds matching clips, and exports them as individual files to a folder you specified (or a default location).You don’t need to click through Jumper yourself, the agent handles the search and export.
USER
lets export the clips to a folder
Worked for 32s
AGENT
All 20 clips have been exported as individual MP4 files to:
~/Downloads/jumper test movies/landscape_clipsFolder structure:Each file is a trimmed clip you can import into Premiere and arrange however you like.
4
Import the clips into your NLE
Open the folder with the exported clips and drag it into Premiere Pro, Final Cut Pro, DaVinci Resolve, or Avid Media Composer. The clips are ready to use.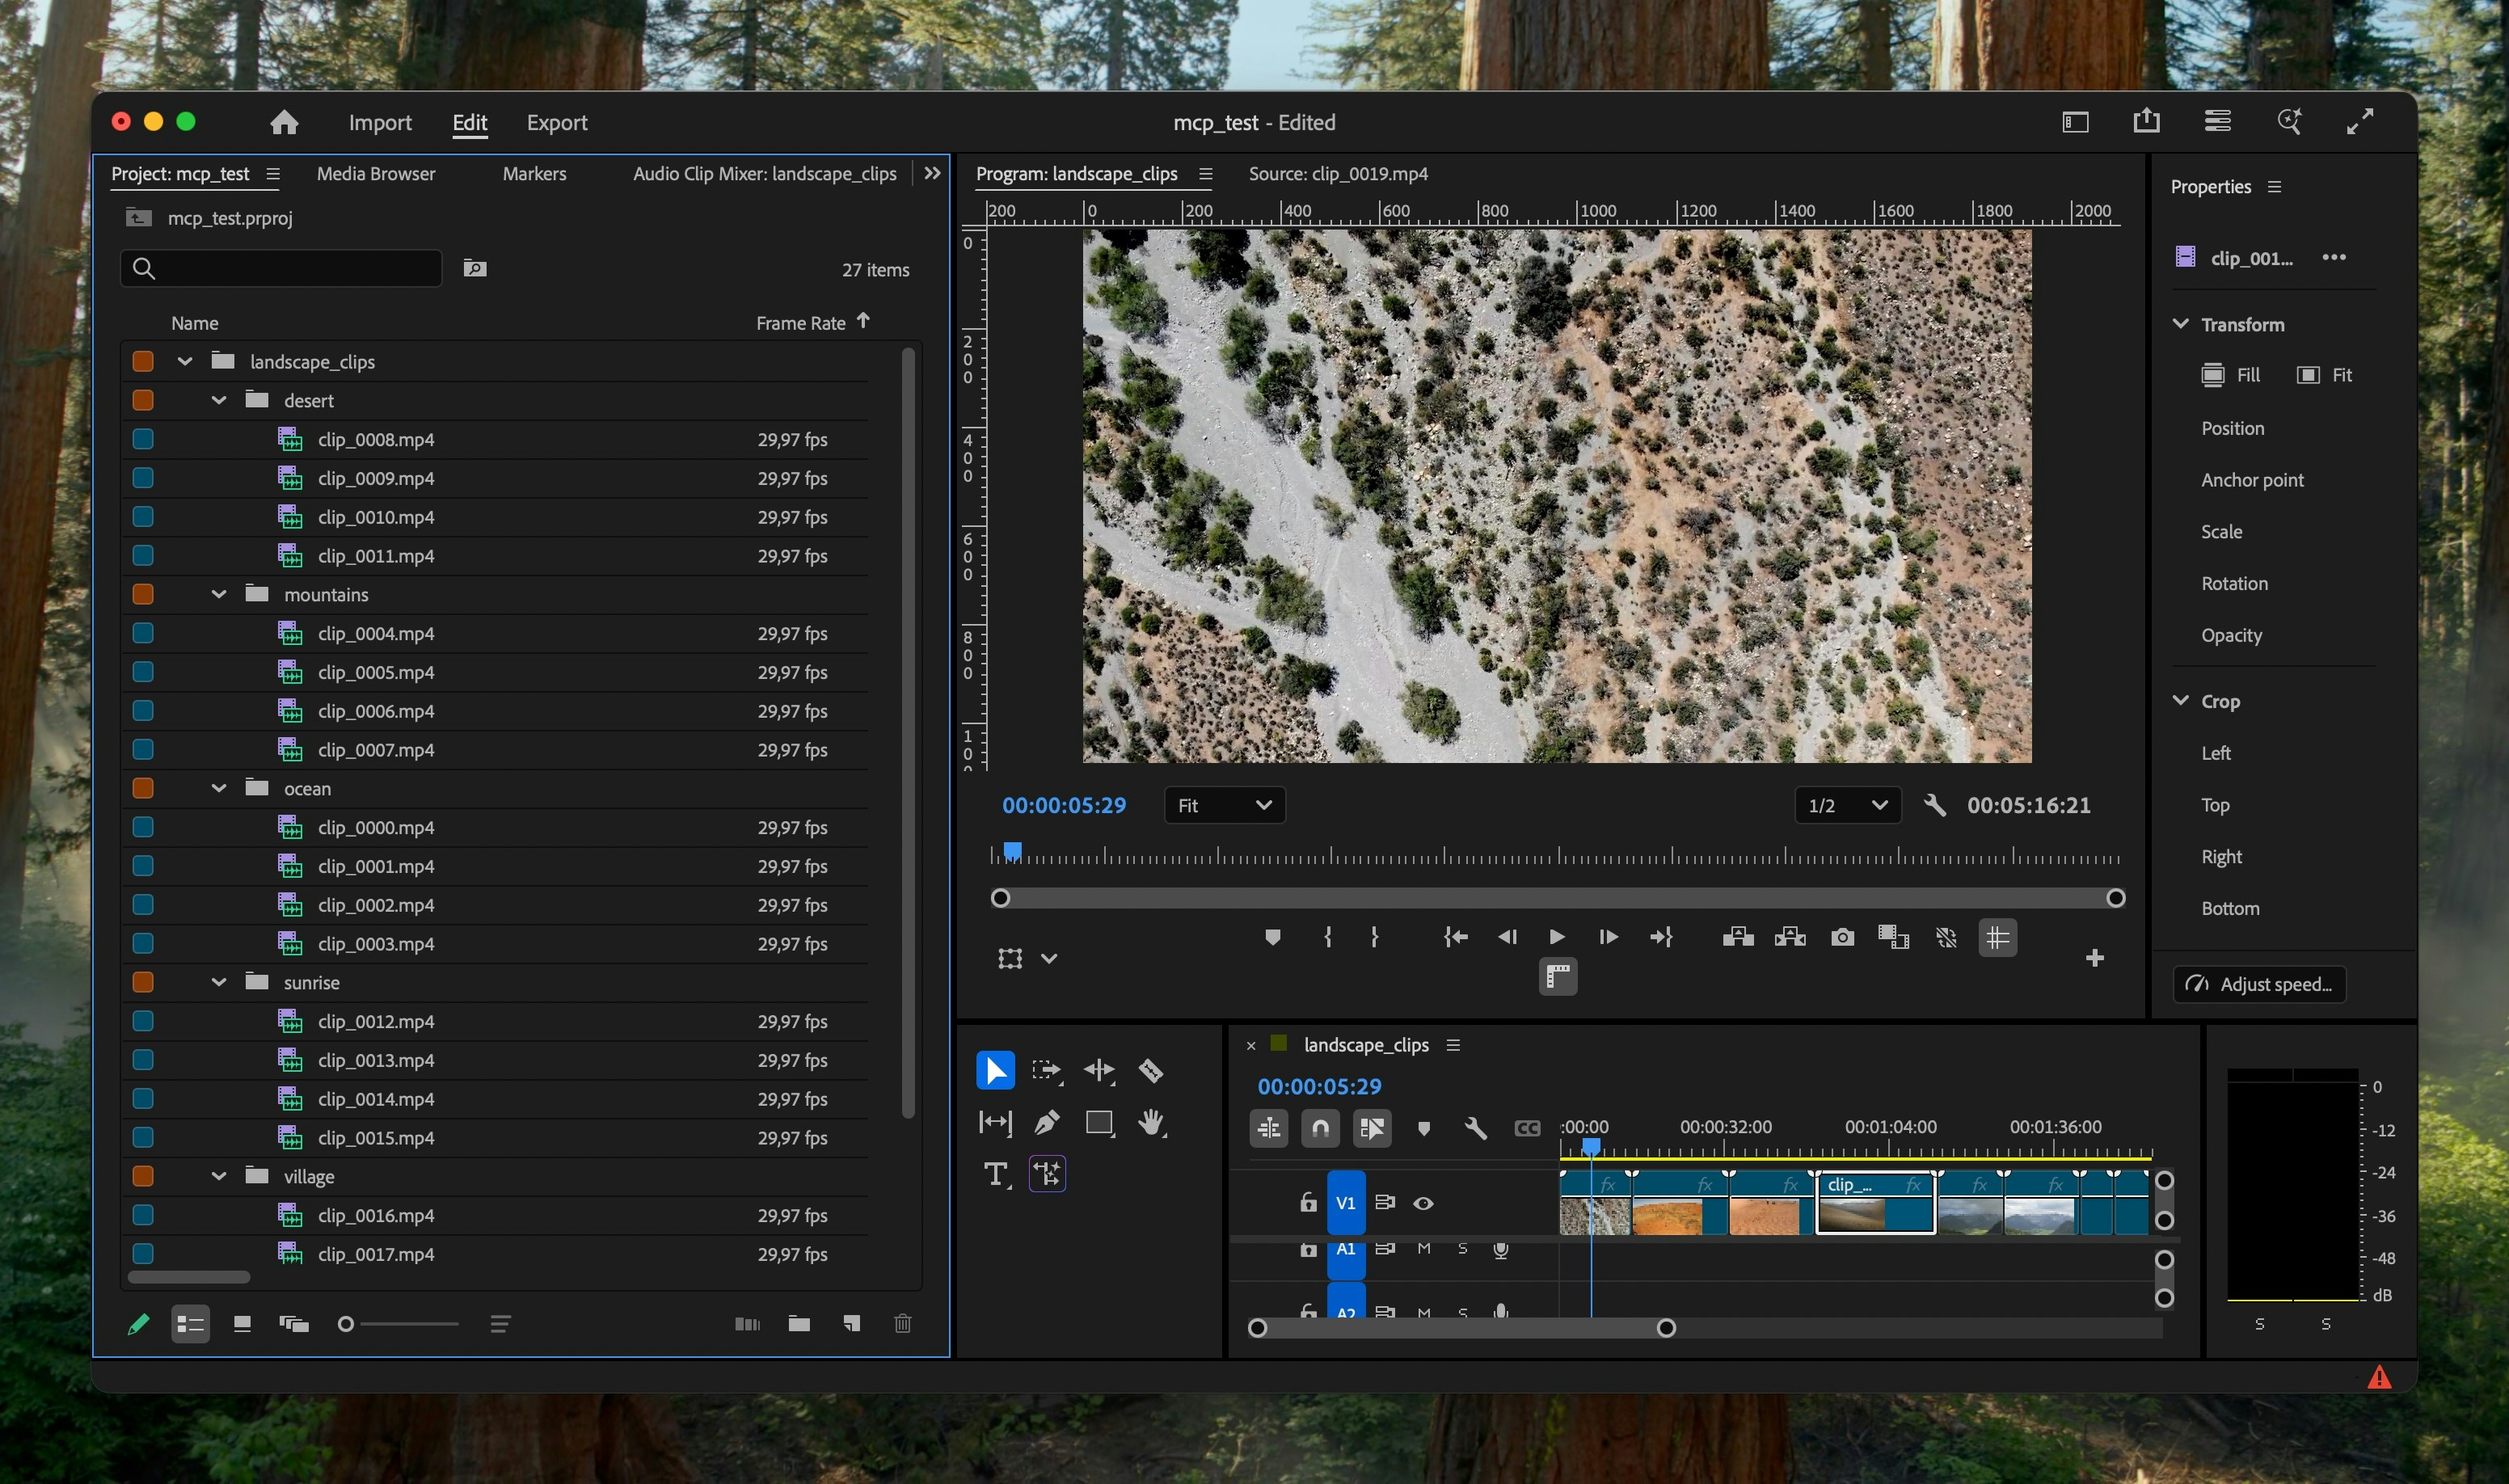
Timeline round-trip
Once you are comfortable exporting clips, try a round-trip workflow: the agent reads your active timeline in Premiere Pro, DaVinci Resolve, or Avid Media Composer, searches your analyzed media, and sends an updated timeline back.1
Open the sequence in your NLE
Make sure the timeline you want to edit is active in Premiere Pro, DaVinci Resolve, or Avid Media Composer.
2
Ask the agent to read and update the timeline
Describe the edit you want in plain language. For example:
USER
Use Jumper to read my current Premiere timeline, find better b-roll for each clip from
~/day1_footage/, and update the timeline with the strongest matches.3
Review in your NLE
When the agent finishes, review the updated sequence in your NLE before locking the cut.
Resulting sequence
Here’s the resulting sequence from the above workflow. 20 clips exported by the agent and dropped into Premiere:What’s next?
- Ask the agent to search for people (make sure you have faces detected and named in the People tab)
- Ask the agent to search in transcriptions to cut the best parts of an interview
- Generate a b-roll sequence from a specific voiceover track
- Ask the agent to export a sequence (Premiere XML, FCPXML) instead of individual files
- Ask the agent to read your active NLE timeline, swap clips based on search results, and send the updated timeline back
- Ask the agent to use your Summary Analyses to research unfamiliar footage before it searches
- Run multiple agent tasks in parallel for different projects