

Connect your organization’s identity provider through OpenID Connect (OIDC) so users can sign in with company credentials. The Admin Panel supports one OIDC connection for the organization.
Before you begin:
  • You have the Issuer URL, Client ID, and Client secret from your identity provider administrator.
  • The Admin Panel is open.
1

Open Company SSO

Open Company SSO in the Admin Panel.
2

Enter the connection details

Enter the Issuer URL, Client ID, and Client secret.
3

Save the candidate

Click Save candidate to save the proposed connection.
4

Test the login

Click Test login and complete the sign-in in your system browser.
5

Confirm the status

Return to the Admin Panel and confirm that the status is Enabled.
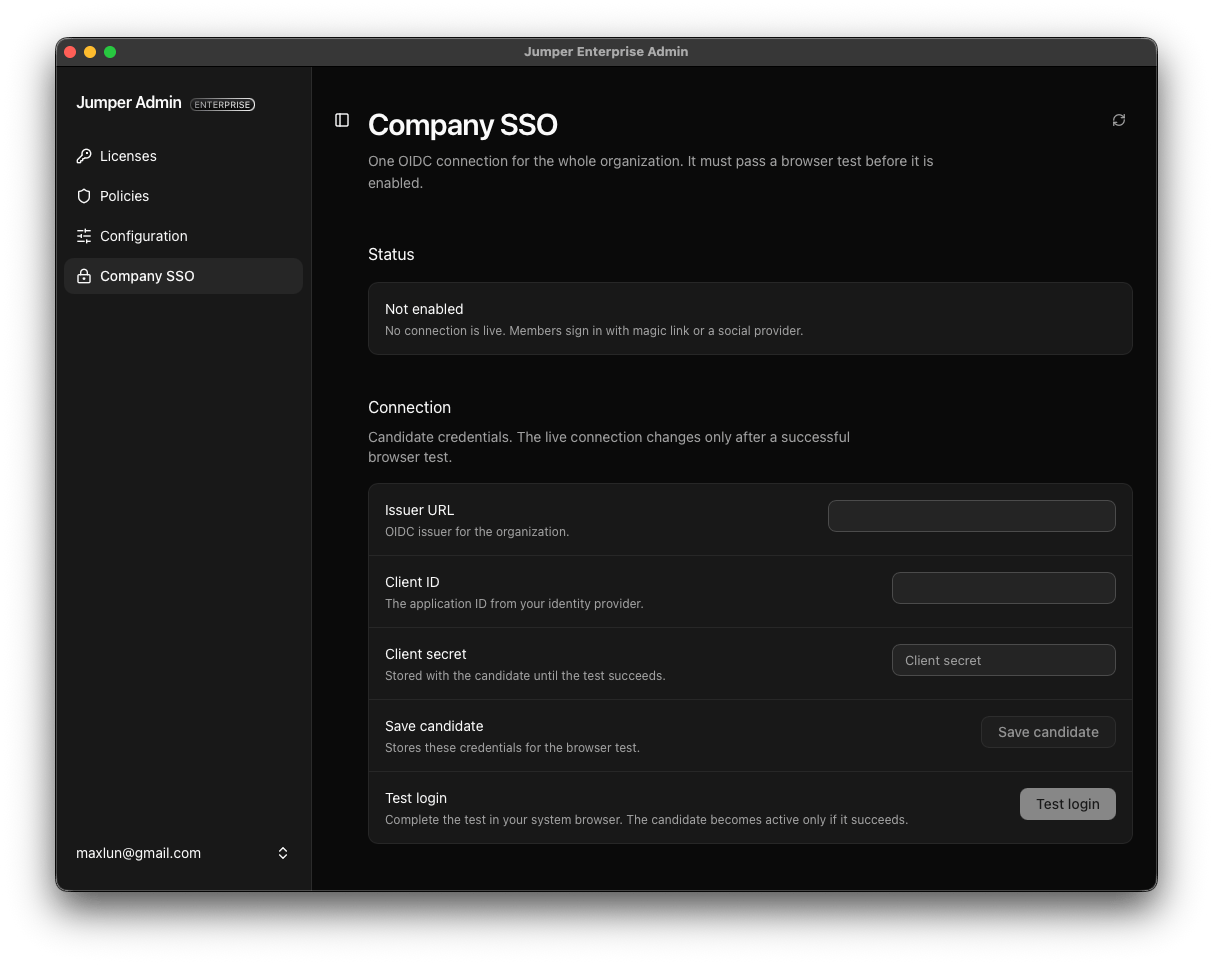
Company SSO settings with OIDC connection fields, Save candidate, and Test login The connection becomes active only after a successful browser test. When replacing an existing connection, the current connection remains active until the replacement passes its test. Once configured, users can enter their work email on the sign-in screen and select Company SSO. For help setting up Enterprise licenses or your organization’s SSO connection, contact Jumper support.
Last modified on October 7, 2026